BeatBuddy Plugin Review
by Goran Rista
The Premise: Using BeatBuddy Content Inside a DAW
Since its launch in 2014, the BeatBuddy pedal drum machine has offered live performers a convenient, hand-free solution for realistic-sounding drums at the press of a guitar pedal. The ability to trigger fills on the go while staying in time and transition from one section to another has prompted some users to use BeatBuddy as a recording tool.
For many years, the only option for utilizing BeatBuddy in your recording workflow has been to record its audio output through an audio interface into the DAW. Even if you use high-end recording equipment with fine AD converters, you may find the results unsatisfactory when listening to them in a controlled studio environment. This will be particularly obvious if you compare the original drum samples to those same samples played back through the BeatBuddy and into your DAW, as I have done for years.
Now, there are a couple of much better options for integrating BeatBuddy into your recording workflow while maintaining the original drumset sound quality. Whether you want to use BeatBuddy to record in Pro Tools, Cubase, Logic Pro, Studio One, or one of the other DAWs, the best approach is to combine virtual DAW drum plugins to produce sound and have physical BeatBuddy pedal act solely as a sequencer.
Full disclosure: I was affiliated with Singular Sound for over a decade and played significant roles in BeatBuddy’s inception and success. I have created all original content owned by my brand, GoranGrooves, which has been distributed on the BeatBuddy pedal for nearly a decade. Additionally, I produced all content for the BeatBuddy Premium Library (except for Jazz Drums MIDI loops by Ludwig Afonso). However, since our partnership officially fell apart in May 2024, Singular Sound carry no favors with me. Read more about that here.
This is my non-biased review and impressions of using the BeatBuddy Plugin, Singular Sound’s early attempt at venturing into the world of DAW.
BeatBuddy Plugin Installation and Launch Attempts
As a Cubase Pro user, I need a VST plugin in 64-bit format. To my disappointment and bewilderment, however, they only include a 32-bit version of the VST plugin, even though Steinberg has discontinued the 32-bit VST plugin format for over a decade! Apple also discontinued support for 32-bit plugins several years ago, so providing the BeatBuddy Plugin in VST format only in 32-bit format seems like quite a rookie mistake.
It has been 5 months since I first tried using the BeatBuddy Plugin, and I was only able to do so in Logic Pro (AU plugin format). One would expect that 5 months later, you would be able to use it as a VST inside DAWs like Cubase. Unfortunately, that is not the case on either Mac or Windows; they provide only a 32-bit plugin format.
- When launching Cubase, the plugin immediately gets blacklisted as a 32-bit unsupported format.
- FL Studio shows the plugin as 64bit and available but fails to load it. Probably because it is not a 64-bit plugin.
- Launching Pro Tools crashes it once it initiates the BeatBuddy Plugin during the launch. Deleting the plugin enables Pro Tools to launch with no problem.
So, it appears that Singular Sound believes they are compiling a 64-bit plugin when, in fact, it is an incompatible 32-bit format.
As things stand now, it seems impossible to use the plugin on an up-to-date Windows system. The plugin is in “beta 0.9” and has been there for several months.
So, if you are “lucky” to be using an outdated 32-bit system with an outdated DAW that can load 32-bit plugins, you may be able to use it.
For anyone with a Mac and Logic Pro DAW: you can take it for a spin.
What Is BeatBuddy Plugin and What Does It Do?
If you are familiar with BeatBuddy, a pedal drum machine that plays MIDI loops through virtual drumsets, triggers fills, and moves between sections with a press of the pedal, you would expect the BeatBuddy Plugin to perform the same or similar operations.
However, that is not the case. The BeatBuddy Plugin would be more appropriately named DRM Player or BeatBuddy Drumset Player. It is essentially a virtual sound module. It does not have a sequencer or any of the functions you usually think of when thinking of the BeatBuddy, the physical unit. It also does not contain MIDI or sampled drumsets. BeatBuddy Plugin is not a replacement for the BeatBuddy pedal drum machine.
The BeatBuddy Plugin can load existing DRM files (BeatBuddy drumsets) on your computer, acting as a sound-generating module through which you can play MIDI loops from your MIDI/ instrument track.
Considering that this is the very first edition of the plugin, it is possible that BeatBuddy’s sequencer features may be integrated at a later date. You have to start somewhere, and in my opinion, it is better to start simple and small, growing from there, than undertake overwhelmingly optimistic projects that never end up being made. Singular Sound and those following it over the years know that all too well.
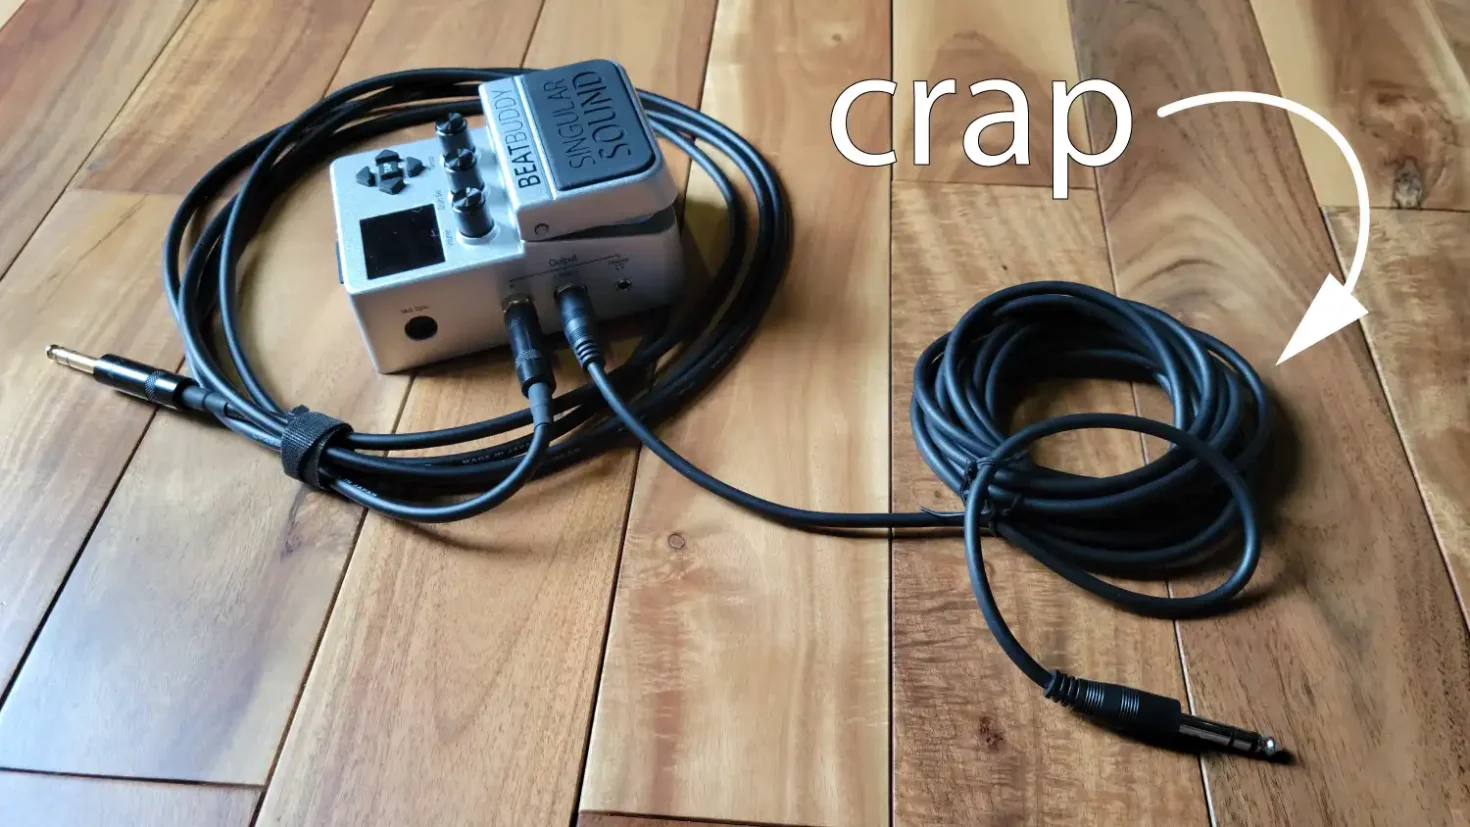
Last summer, while in Europe, away from my recording studio, I needed to create demos for the updated content I was relaunching in the new BeatBuddy Premium Library. I had access to a BeatBuddy pedal and a recording interface, but one of the TRS cables was crap, and it emitted unacceptable noise. This was on top of BeatBuddy’s inherited sound quality output limitations. After being bummed for a short while, I remembered that Singular Sound launched a beta version of the BeatBuddy Plugin. “Perhaps I could use that to record demos of the updated BeatBuddy drumsets!” I thought to myself, excited.
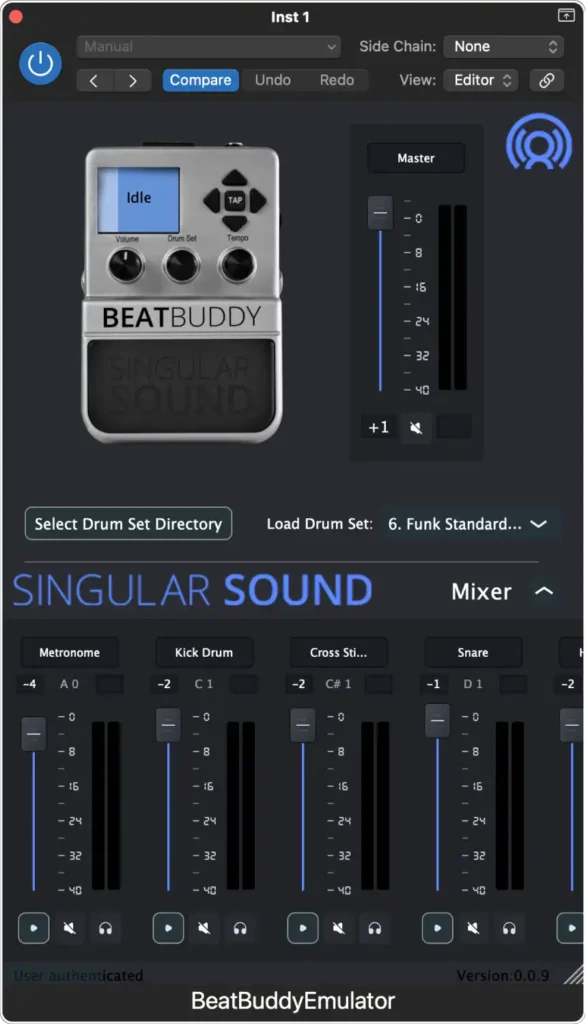
I had to use the AU format inside Logic Pro, which I was fortunate to have, even though I am not too familiar with it. That’s the only plugin format of the BeatBuddy Plugin able to load with no problem, and its GUI popped up.
Ha! Nice! The GUI was large, clean, and beautifully designed. We are off to a good start.
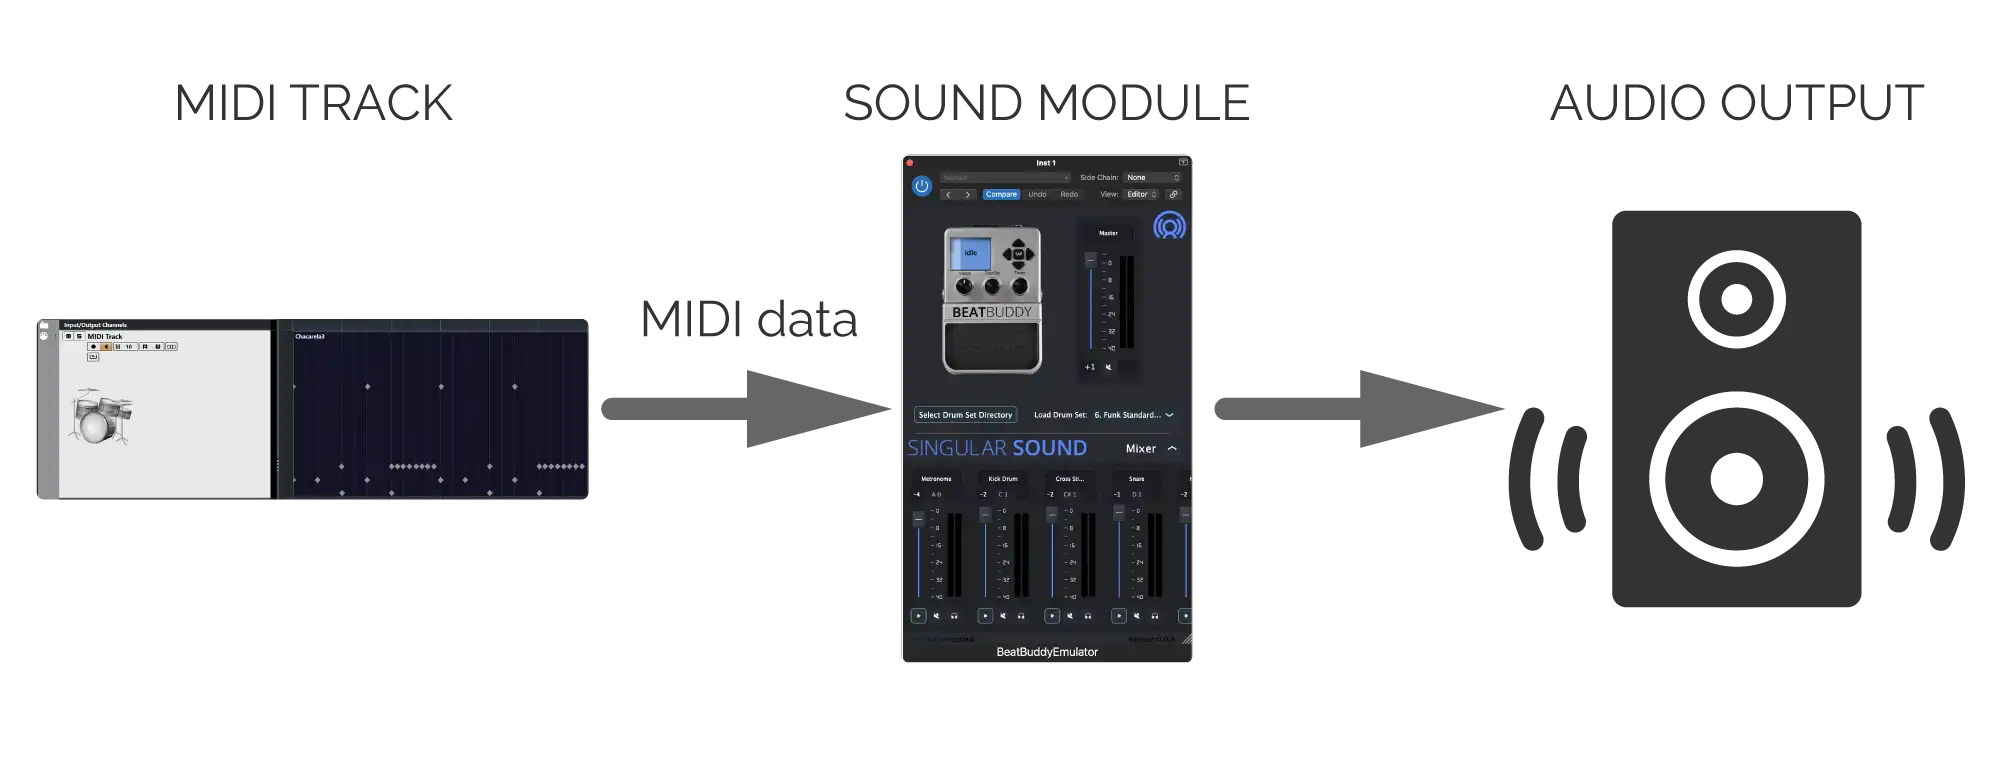
To use it in your DAW, you must first create a MIDI or instrument track (depending on your DAW) and route it to the BeatBuddy Plugin loaded within your DAW’s session. Whatever drum grooves you program on the MIDI/ Instrument track or MIDI loops you place on it will play through the BeatBuddy Plugin. The sound that the plugin outputs will depend on what DRM drumset is loaded within the plugin.
You must have at least one DRM drumset on your computer for the plugin to be able to produce a sound.
Who Is The BeatBuddy Plugin For, and Why Use It?
If you already own a BeatBuddy pedal drum machine or are planning on getting one, AND if you are likely to do any sort of recording with your BeatBuddy, AND you care about the sound quality, then this plugin is an absolute must-have. This is assuming you can actually load it inside your DAW.
However, if you are a DAW user who doesn’t own the BeatBuddy pedal and is looking solely for virtual drum plugins, it would be silly to even consider this plugin. There are far better alternatives for such needs.
Here is why this plugin is an excellent tool for BeatBuddy users looking to record.
BeatBuddy is a practical little device for live performances. But here is the thing about performing live: conditions are never ideal. Far from them! There are acoustical issues, environmental circumstances, and questionable attention of anyone attending, and usually, live performances are fleeting moments, gone with the wind. So, there is a lot of room for imperfections and forgiveness regarding sound quality.
That is not the case when it comes to studio recording, when everything is documented for the ages.
Let’s look at the journey an audio sample makes through BeatBuddy.
1. Drum mixing: Acoustic drums recorded in multitrack 24-bit depth are edited, and individual samples are mixed to stereo WAV, either 32-bit floating point or 24-bit.
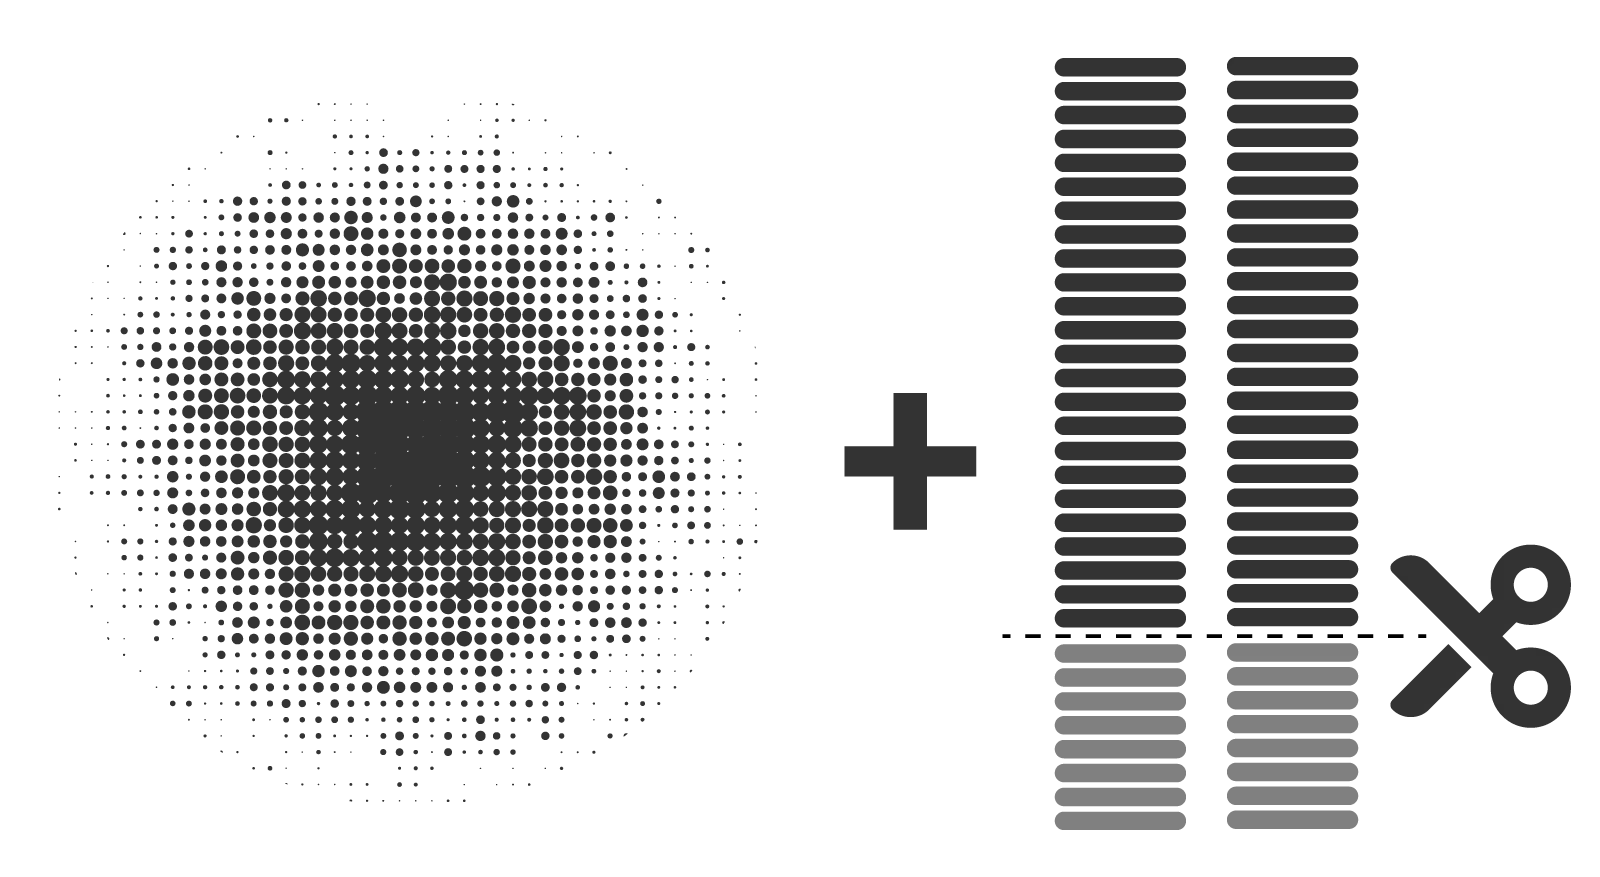
2. Ditherring to 16-bit: The original stereo 32-bit floating point or 24-bit drum samples are dithered and saved to 16-bit WAV to create Beatbuddy Drumsets with a 100MB/drumset limitation.
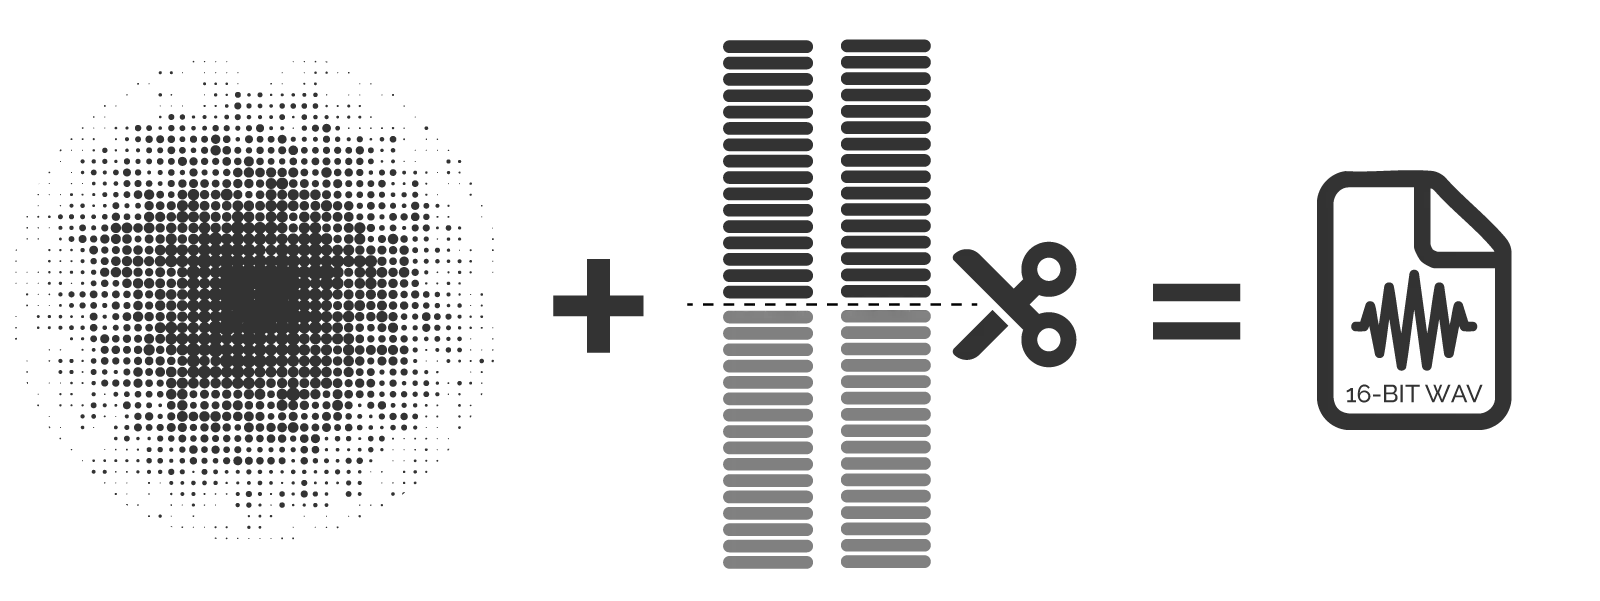
3. Internal remix and re-dithering to 24-bit: When triggered inside BeatBuddy, the sampled drumsets are internally processed in 32-bit, then dithered again (to 24-bit) before output.
4. Digital to Analog conversion, which inevitably introduces errors and noise.
5. TRS output jacks and connections to them from the D/A converter, further introducing noise from the DC power supply.
6. Audio cables connect the BeatBuddy to an input of either a live mixing console or an audio recording interface. The quality of the audio cables may degrade the signal.
7a. If playing live, you now have a mic preamp, mixer, and amplifier before outputting sound into the open. Those components will either degrade or color the sound of the original drum samples.
7b. If recording, you now have a mic preamp, which, unless it is very transparent, will color the sound.
8. Analog to digital converter, which, if not pristine, will further degrade the sound and color it.
Only then will you have access to whatever remains of the original drum samples.
Using the DRM drumset directly inside your DAW, you skip several steps of sound degradation (steps 3-8). That can make a very audible difference, and to appreciate it, you’ll need to listen in a controlled studio environment and not on a smartphone while riding a train.
In addition to straight-up triggering the sounds from DRM sample libraries, users can adjust the levels of individual drum components contained in any given DRM drumset. However, remember that this is solely for playback purposes, and those adjustments will not affect the integrity of the DRM file (for better or worse). If you wish to adjust the levels of instruments in your BeatBuddy drumset for use on the actual BeatBuddy pedal, you must use the BeatBuddy Manager or BB Manager Online software.
A very neat detail is that the plugin channels automatically populate based on used notes in the loaded DRM file. So, if your DRM drumset has only kick, snare, and closed hats, you’ll only see three faders for those instruments. Some instruments like hi-hat may contain several notes (closed, open, foot), and the plugin will display a fader for each of these articulations.
More complex drumsets that utilize many notes will result in numerous faders. However, there is a slider allowing you to scroll across the faders, and unless the loaded drumset is entirely out of whack with its instrument balances, you won’t need to adjust it much. You can load the plugin, close the GUI, and focus on your loops.
The signal meters will move whenever an instrument generates sound, providing at-glance confirmation that things are working okay.
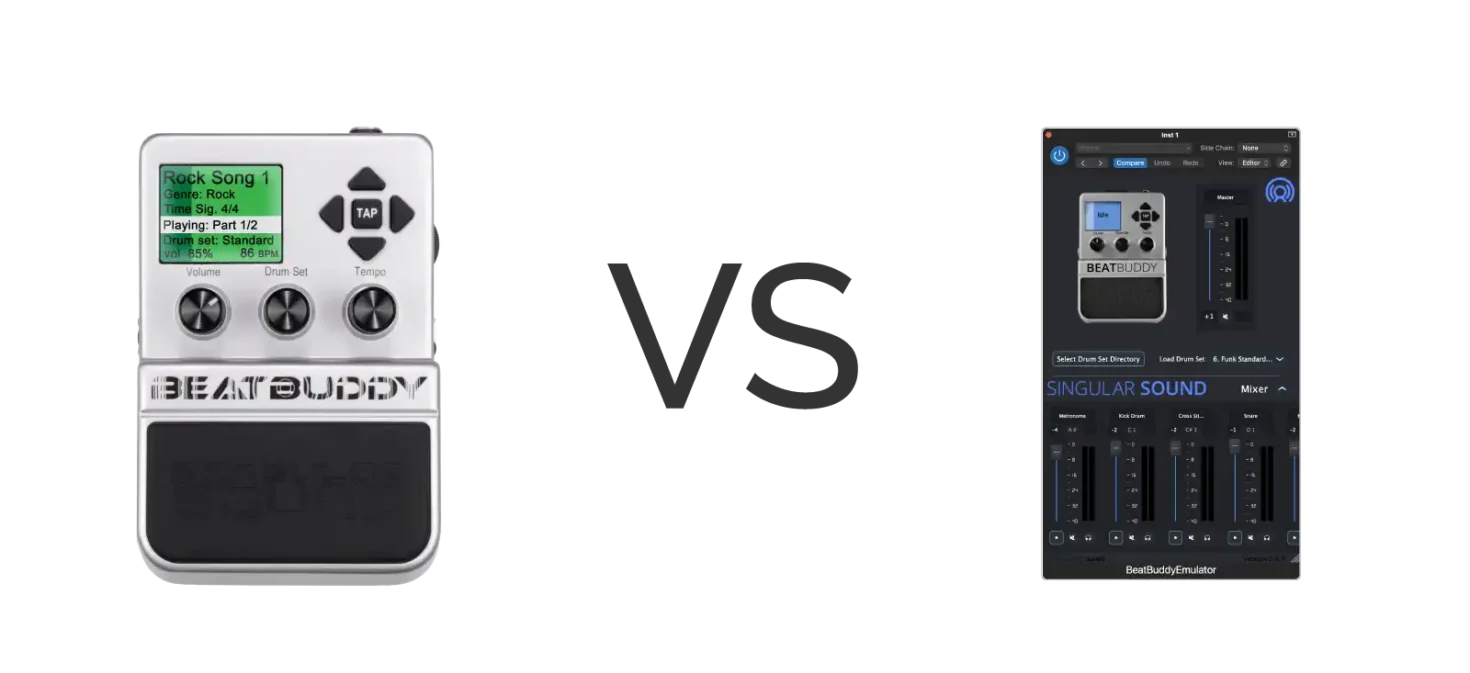
Let us listen to the sound difference between recording an output of BeatBuddy to using the identical DRM drumset directly inside a DAW. We’ll compare both to the original samples.
For the test, I am using high-quality professional mic pres and converters to record the input of the BeatBuddy, which will likely yield better results than what most BeatBuddy users will get in their entry-level recording interfaces.
Mic Pres: Focusrite ISA828
A/D Converters: Lynx Aurora-N
Procedure: I used a single sample from 4 instruments: kick, snare, bata drum, and pendereta. The original samples were mixed and normalized to 0db digital and saved in 32-bit floating point. The original samples were then dithered with noise shaping and saved to 16-bit wav, which is what was used to create DRM test drumset. Every time a note is played, a single sample is triggered repeatedly.
The BeatBuddy output volume settings was set to 100% and the input gain adjusted on the mix preamp to avoid clipping.
I created 1 bar of MIDI events in Cubase, which were triggering BeatBuddy instruments, and BeatBuddy’s output was simultaneously recorded into Cubase. The first recording was conducted by sending MIDI notes to BeatBuddy at their highest velocity, 127, resulting in BeatBuddy producing output at 0db on the digital scale.
The second recording was done by sending MIDI notes at a velocity of 64, which resulted in an output signal of approximately -5.5db on a digital scale. Everything was recorded in 24bit, normalized to 0db, and saved in 32-bit floating point so that accurate comparisons can be made and recording integrity remains 100% accurate to the original.
How to listen: Play a single instrument’s sample repeatedly, then another version of the instrument, back to back. Pay attention to the top end of the audio spectrum and the ambiance. Listen in a controlled environment on a good-quality sound system or headphones.
| KICK | SNARE | BATÁ | PANDERETA | |
| Original 32bit | ||||
| Original dithered to 16bit | ||||
| BeatBuddy capture vel 127 | ||||
| BeatBuddy capture vel 64 | ||||
| BB Plugin vel 127 | ||||
| BB Plugin vel 64 |
Findings: Audible differences will vary depending on the source material and the velocity at which an instrument is played. BeatBuddy most certainly alters the sound of everything it outputs to various degrees. The lower the MIDI velocity, the more attenuation BeatBuddy needs to apply to a sample, and the more pronounced the changes become.
Ideally, when a note is played at a velocity of 64, the resulting audio output, once normalized (adjusted for the volume difference), should be 100% identical to that of a sample that was triggered at a velocity of 127 (minus the noise floor that gets raised by 6db). That is certainly not the case with the BeatBuddy pedal. Sound degradation becomes more pronounced and obvious the more the samples are attenuated (notes played at lower velocities).
There is a loss in the top end of the frequency range and a loss of ambient information. This is more prevalent when an entire drumset is used, and this loss becomes cumulative, resulting in a less realistic-sounding virtual drumset.
On the other hand, the BeatBuddy Plugin seems to keep the original sound quality intact. There is a difference in audio quality between the pedal and the plugin, and that is most noticeable in samples with short decay with ambiance, such as the snare and kick.
Conclusion: The BeatBuddy pedal audibly deteriorates the sound of the DRM sample libraries it plays, while the plugin preserves the quality of the original WAV samples.
How To Use The BeatBuddy Plugin In Conjunction With The Physical BeatBuddy Pedal
If you already have a BeatBuddy and wish to use it for recording along with the BeatBuddy Plugin, here is how to do it.
The physical BeatBuddy unit will act solely as a sequencer, and you will use the BeatBuddy plugin as a virtual drumset module.
The exact procedure for setting a track to record BeatBuddy’s MIDI data into a DAW will depend on the particular DAW you are using, so you should consult their documentation if you are not already familiar. We’ll cover the overall principle here.
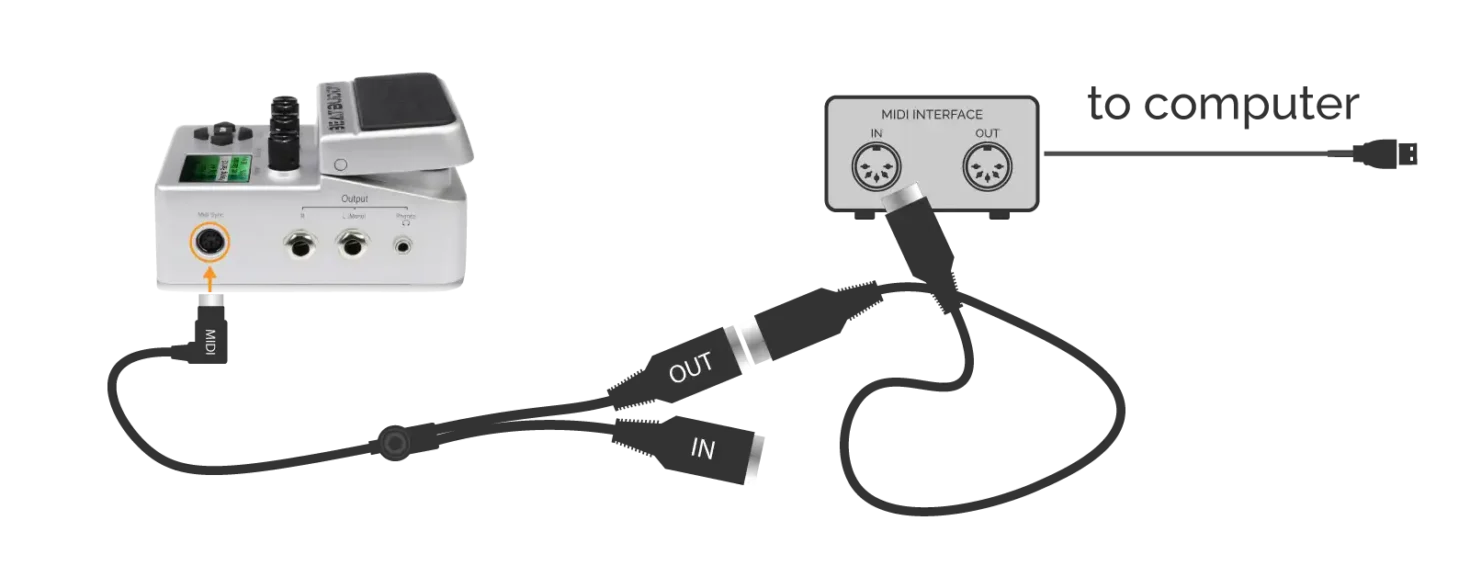
- Connect your BeatBuddy’s MIDI output, using the dedicated MIDI splitter cable, to the MIDI input of your computer’s audio/MIDI interface, as seen in the image above.
- Create a new MIDI track in your DAW. Set it to channel 10, and select your physical audio/MIDI interface as the track’s MIDI input. Set the track’s time format to “musical” instead of “linear”, if the option is available.
- Set the DAW’s tempo to match that of the BeatBuddy song you will be recording, or vice-versa.
- Load the BeatBuddy plugin inside your DAW and connect it to the output of the MIDI track you previously created so that everything on your MIDI track will play through it.
- Inside the BeatBuddy Plugin, load one of the DRM drumsets you have on your computer.
- Enable recording on your MIDI track, press record, start your selected song on the BeatBuddy, and then trigger fills and transitions using the pedal. As the BeatBuddy pedal is sending MIDI data into your DAW, it will trigger the sounds inside the plugin and you should be able to hear them.
- Once you perform the entire song, stop the BeatBuddy, then stop recording in your DAW.
Now that the MIDI data is recorded, you can shift the entire MIDI event to align it with the grid in your DAW. That way, you can make edits to the MIDI performance.
As the track is in the “musical” mode, the recorded drum performance will follow if you change the tempo in your DAW.
You could get more fancy and run MIDI out from your DAW into BB to send a CC command to start playback when you press record in your DAW if you want to keep everything in sync from the start, but it is unnecessary. A simple nudge after the fact will do the job.
BeatBuddy Plugin compared to other Drum Plugins?
Well, at this point, comparing the BeatBuddy Plugin to pretty much any virtual drum plugin out there would be unfair. It feels to me that it would be akin to comparing apples to oranges. This is a really bare-bones drum plugin player and serves a very limited purpose for a niche BeatBuddy user base. As such, it is kind of in a category for itself.
However, should Singular Sound decide to market them apples as oranges, I’ll gladly make an apple puree of them.
The most significant inherited limitation of the BeatBuddy Plugin format is that it relies on a severely limited DRM sample library format. Not only is the DRM file currently limited to 100MB, but its functions are very limited in scope. Let us remember that the DRM library format was created for the physical BeatBuddy pedal, so the entire architecture for the BeatBuddy will need to change for this format to be more encompassing.
Due to its size, DRM libraries are 16-bit and strictly limited in dynamic layers and round-robin groups (16 samples per instrument), which is a far cry from what most virtual sample libraries available today offer.
The plugin also lacks some elementary functions, such as drum mapping and multiple outputs.
The plugin can simply trigger one-shot samples and mute them with regular fade-outs.
Advanced features, such as variable hats (found in Handy Drums) and any advanced algorithms needed for professional use, would be a fantasy at this point.
Available Platforms and Formats
The BeatBuddy Plugin is currently available in beta v0.9 for Windows and MacOS.
Plugin formats are 32-bit VST3, AAX, and AU.
However, as mentioned above, the only format that could load was the AU inside Logic Pro on my M2 Mac Mini.
Goran Rista’s Final Verdict
The BeatBuddy Plugin is a welcomed addition to the BeatBuddy ecosystem. If you own a BeatBuddy and record yourself using a DAW, this plugin should be part of your setup.
It has a clean, modern, beautiful, easy-to-understand, and easy-to-use GUI, and it allows you to truly hear the samples contained in the DRM sample libraries you have on your computer.
The plugin is still in beta and can be downloaded for free from the Singular Sound forum, so there is no reason not to try it out.
According to Singular Sound, the plugin will remain available for free even when released, but in the future, if you wish to change the drumsets, you’ll need to pay for that functionality.
I wish this plugin had been available when I created demos for the BeatBuddy Premium Library over the years. It would have made a very positive audible difference. Going forward, I will certainly utilize it whenever I create demos for BeatBuddy content and purchase the option once it is available for sale.
What is concerning, however, is that the plugin is still in beta as of writing this review, some 7 months after its launch in June 2024. It has been sitting as v0.9 for the last 6 months and is not usable on any current VST-supporting DAW, either Windows or Mac. Let us hope that this is not yet another one of Singular Sound’s software ventures that never gets adequately completed.
Another problematic aspect is that the plugin requires an internet connection to work. I received a “user not authenticated” message for several minutes when I tried to use it. A plugin’s functionality should not depend on the internet connection or the feasibility of the server it is trying to reach. The most Internet it should rely on is for authorizing the software the first time.
If you are not a BeatBuddy user or are a BeatBuddy user looking for higher audio quality and powerful yet easy-to-use features in drum plugins, you should check out our award-winning Handy Drums plugins.
All DRM drumsets found in Default Content for BeatBuddy were produced and owned by GoranGrooves. Most are also available as Handy Drums, which have more extensive sample libraries, 24-bit depth, more dynamic levels, and round-robin groups.
Advanced features, like GoranGrooves’ variable hats, bring unparalleled drum realism to your DAW.
The integrated MIDI Loop Browser allows you to audition any MIDI file directly inside them and then drag them into your DAW session. This includes MIDI loops used in BeatBuddy songs.
Visit any Handy Drums product page to learn about all the features and get a free trial to experience them for yourself.
