About the “Default Content” #
BeatBuddy’s “Default Content” is a project consisting of drumsets and BeatBuddy songs (consisting of MIDI loops and arranged into folders) that Singular Sound has distributed with the physical BeatBuddy units since 2014. All drumsets and songs included in this project were produced and are owned by GoranGrooves (the producer is Goran Rista) and licensed to Singular Sound for this purpose.
In 2019, GoranGrooves released an updated edition of the “Default Content,” version 2.0, which has been distributed with physical BeatBuddy units since. Version 2.0 wholly revamped all MIDI loops included in songs, introduced new MIDI loops, and included remixed versions of several drumsets and a brand new version of the “Standard” drumset. There have been some significant changes to the drum mapping, namely to the Latin Percussion drumset.
From June 1, 2024, GoranGrooves and Singular Sound have parted ways and are no longer associated.
All official future updates and support for the content produced by GoranGrooves and initially licensed to Singular Sound will be available at GoranGrooves Library. Going forward, such a project will be known as “GoranGrooves Default Content For BeatBuddy,” with “BeatBuddy” indicating the compatible platform.
Important Information #
- “GoranGrooves Default Content For BeatBuddy” is supplied as a BeatBuddy project, containing drumsets, songs, relevant references, and the overall project structure.
- It includes the latest version of GoranGrooves Default drumsets for BeatBuddy.
- You do not need to use any other software to install the project onto your SD card.
- The supplied installers for Windows and MacOS will install the project directly onto your blank SD card. You can not install it outside the selected drive’s root directory.
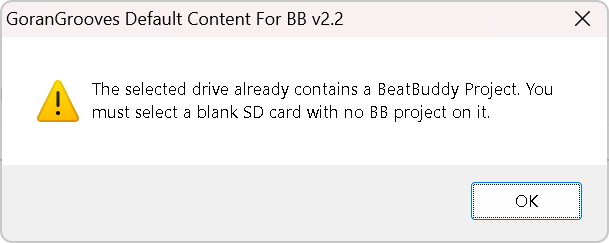
- The SD card must NOT contain a BeatBuddy Project for the installation to succeed. If it does, installation will not be initiated. The installers have checks in place to ensure you are NOT installing over an existing project.
- The SD card must be properly formatted in FAT32, with MBR, and be between 4 GB and 32 GB. For details on formatting your SD card for use with BeatBuddy, see this document.
- Also included are “drumsets-only” installers for Windows and MacOS that allow you to update only the drumsets of your existing Default Content 2.1 if you have changed the default songs or created custom content. For detailed instructions, see How To Update GoranGrooves Default Drumsets For BeatBuddy.
- GoranGrooves Default Content for BeatBuddy is distributed as a free product on GoranGrooves Library. You can obtain it by visiting its product page, adding it to the cart, then completing the checkout.
- The GoranGrooves Default Content For BeatBuddy CHANGELOG is here. It lists all changes to date.
Installation on Windows OS #
Step 1- Download the product #
Download the GoranGrooves Default Content for BeatBuddy from your GoranGrooves Library account.
Click on the large DOWNLOAD button for the product.
A popup menu will allow you to select the operating system you use to install the product. Navigate to the “Windows: Install directly on SD card” folder and click on the file within it.

Please wait until the download has been completed fully. The installer is over 260MB in size, so it may take several minutes to download with a slower Internet connection. You will find the downloaded file in your default download directory as set by your browser.
Step 2- Insert a blank SD Card into the card reader #
Insert a blank SD Card into the card reader connected to your PC.
This can be the SD card that came with your BeatBuddy, or another SD card. For better performance, faster read and write times, we recommend a “Class 10” SD card of at least 4GB in size.
In either case, the SD card must NOT contain another BeatBuddy Project.
Step 3- Launch the installer #
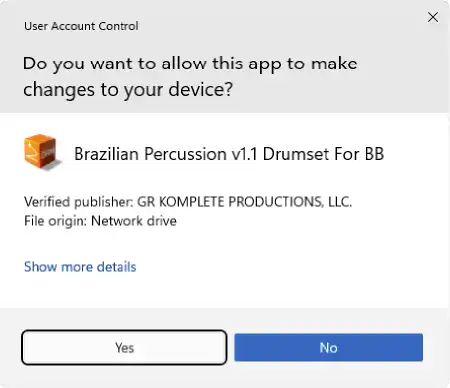
Double-click on the installer you downloaded in step 1, with the .exe extension.
When the Windows security warning pops up asking if you wish to allow the app to make changes to your computer, click YES.
After a few moments, you will be presented with the installation dialog, which will guide you through the step-by-step process.
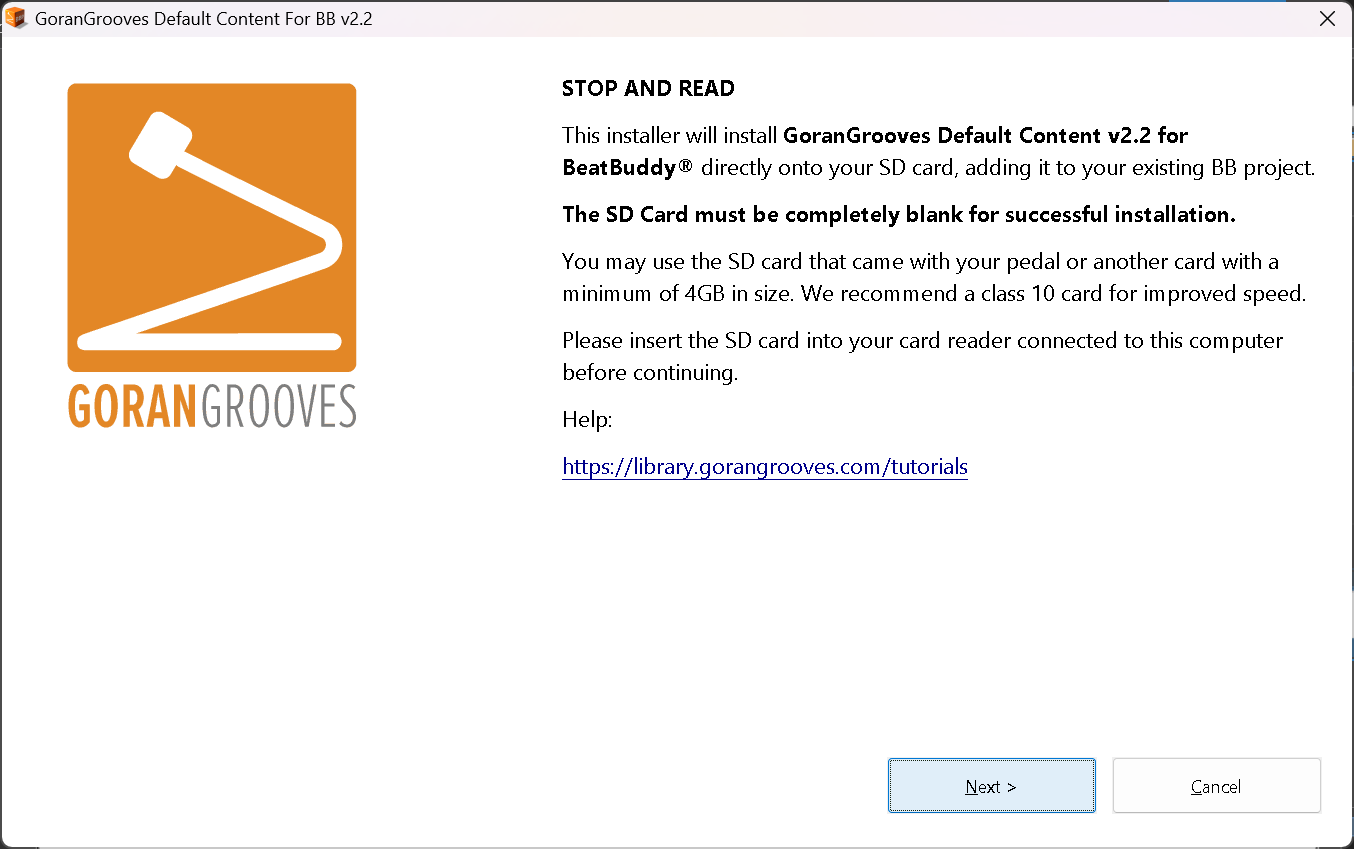
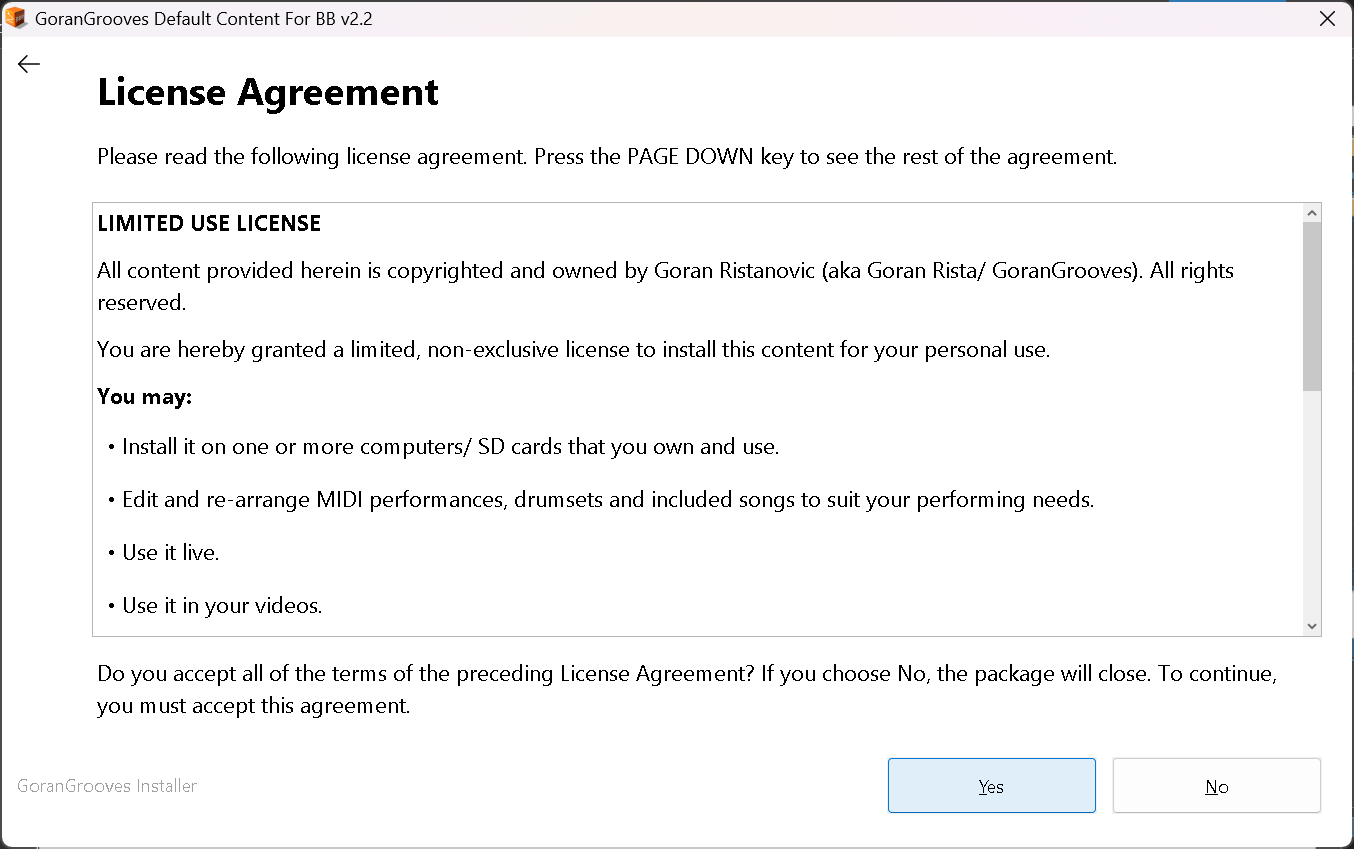
Read the licensing information and proceed to the next step by clicking on the NEXT button.
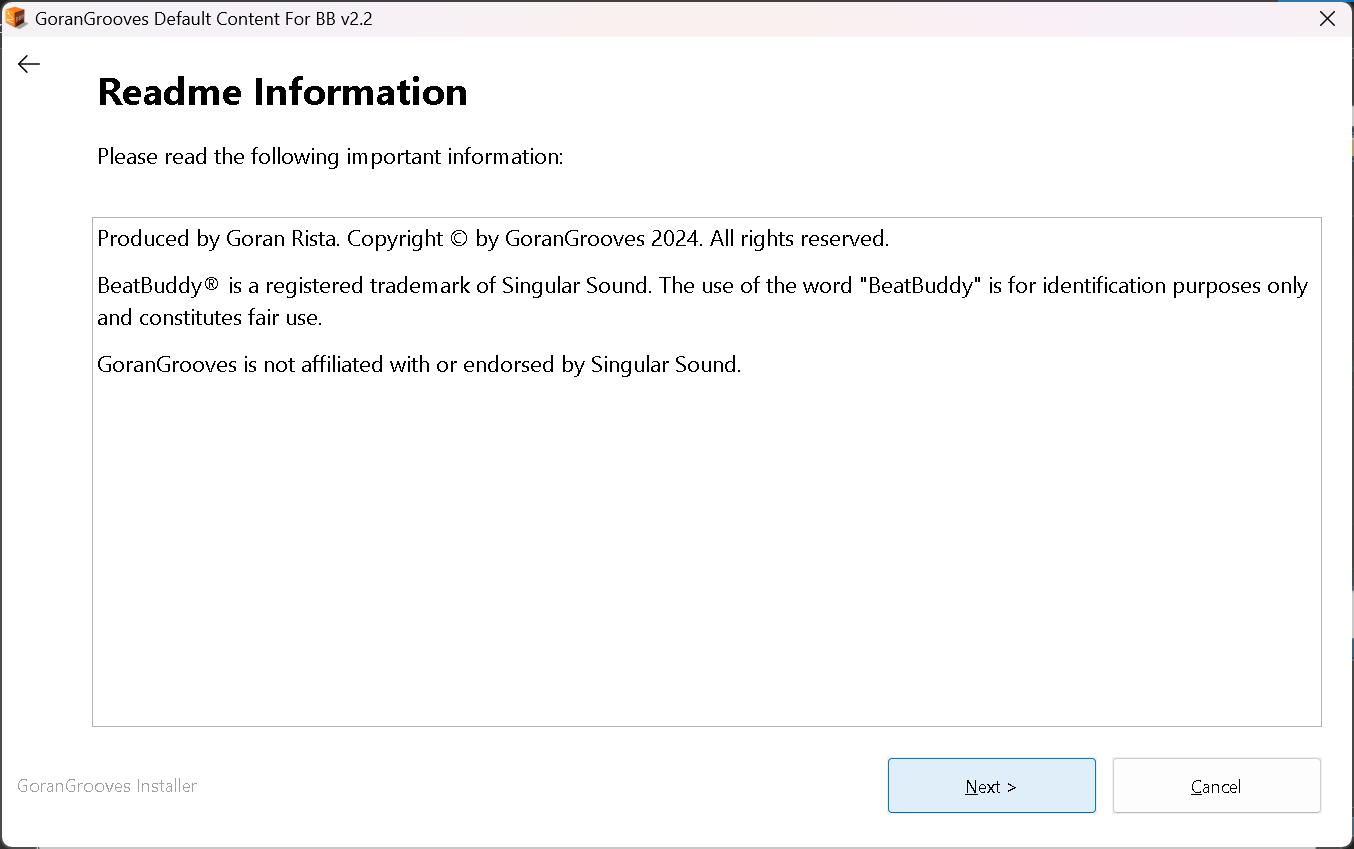
Agree to the license agreement by clicking “Yes” to continue installing.
Step 4- Select your USB drive with an SD card #
When prompted, navigate to your SD card drive.
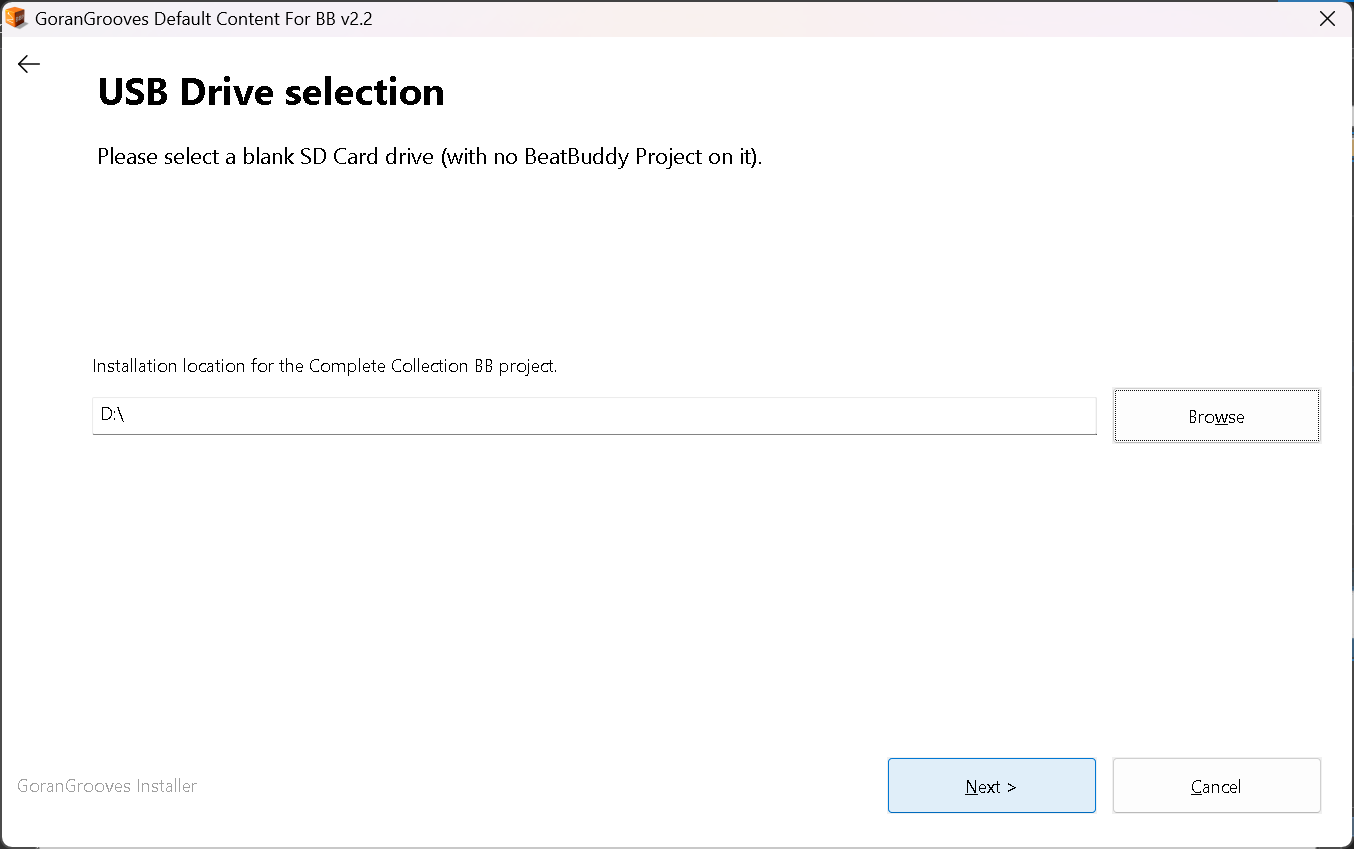
IMPORTANT: The installer will look for the root of your selected drive, regardless of which directory you navigate to on the drive. For example, if you navigate to “G:\Some folder\Another Folder\My BB Project\”, the installer will look at “G:\” as the installation location.
If an existing BeatBuddy project is found in the root directory, the installer will prompt you to select the drive again and continue to do so until a blank drive is selected or you quit the installation.
Click “NEXT” to begin the installation process.
Step 5- Installation #
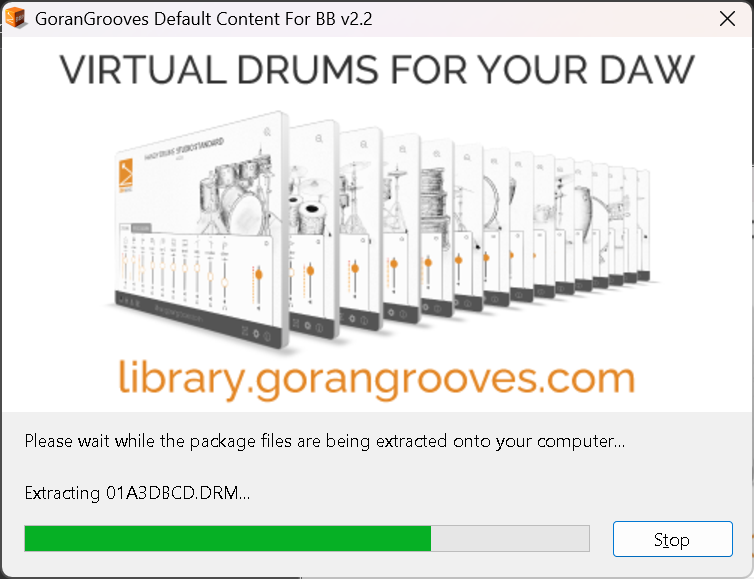
The installer contains nearly 500 items and is over 600MB in size when extracted. Depending on the speed of your SD card and its reader, the installation may take several minutes to complete. While the process is running, you will see the progress splash screen.
Upon successful installation, you will be presented with the success message.
Take the SD card out of your card reader, insert it into your BeatBuddy, and enjoy.
If the SD card doesn’t show when inserted in BeatBuddy, it was probably not properly formatted, or it is too large. For detailed troubleshooting and resolution, see this document.
Installation On MacOS #
Step 1- Download the product #
Download the GoranGrooves Default Content for BeatBuddy from your GoranGrooves Library account.
Click on the large DOWNLOAD button for the product.
A popup menu will allow you to select the operating system you use to install the product. Navigate to the “MacOS: Install directly on SD card” folder and click on the file within it.

Please wait until the download has been completed fully. The installer is over 370MB in size, so it may take several minutes to download, depending on your Internet connection speed. You will find the downloaded file in your default download directory as set by your browser.
Step 2- Insert the SD Card into the card reader #
Insert an SD Card into the card reader connected to your Mac.
This can be the SD card that came with your BeatBuddy, or another SD card. For better performance, faster read and write times, we recommend a “Class 10” SD card of at least 4GB in size.
In either case, the SD card must NOT contain another BeatBuddy project.
Step 3- Launch the installer #
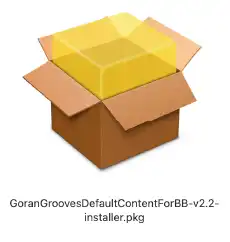
Double-click on the installer you downloaded in step 1.
You will be presented with the installation dialog, which will guide you through the step-by-step process.
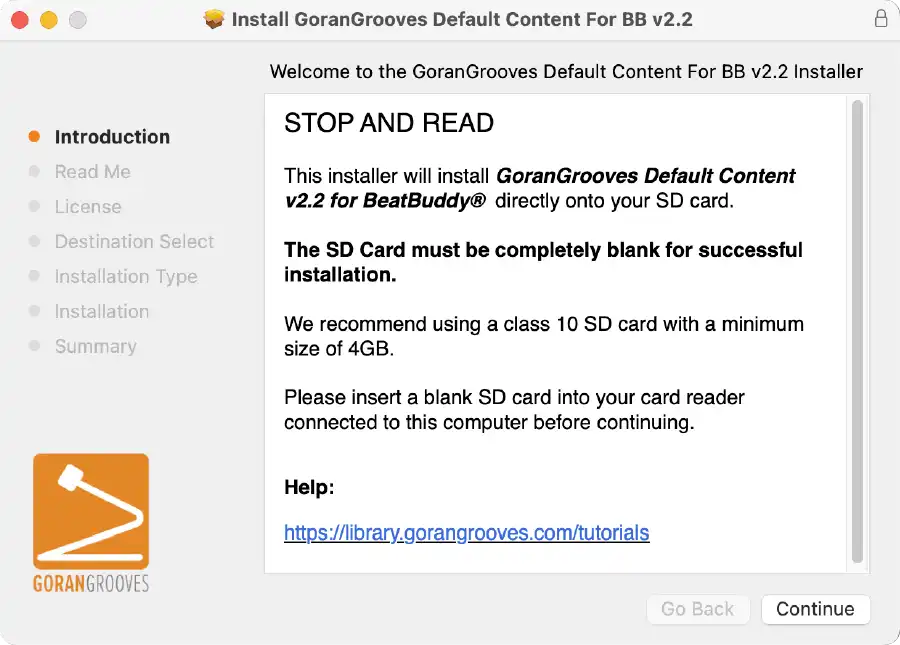
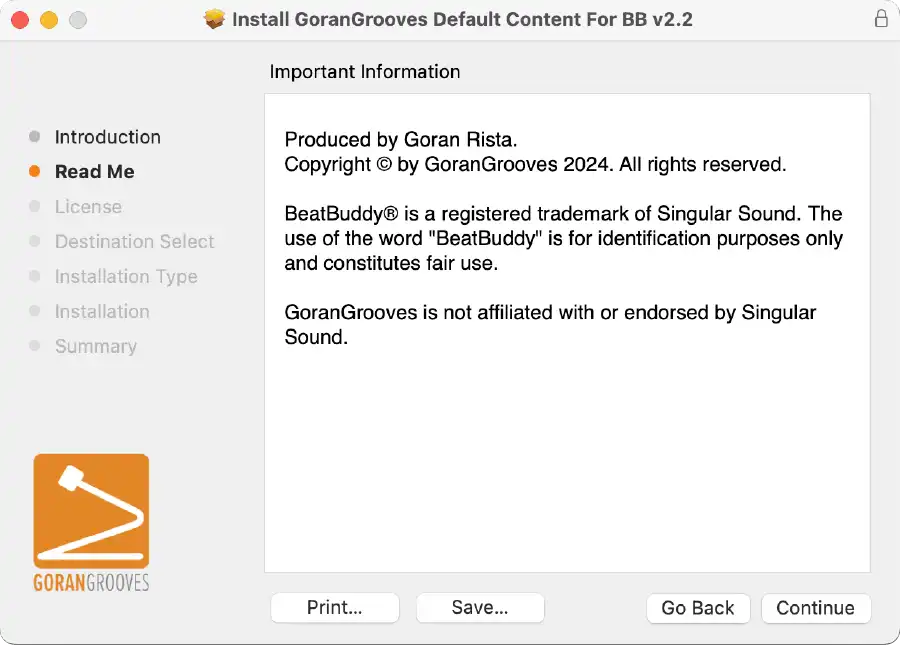
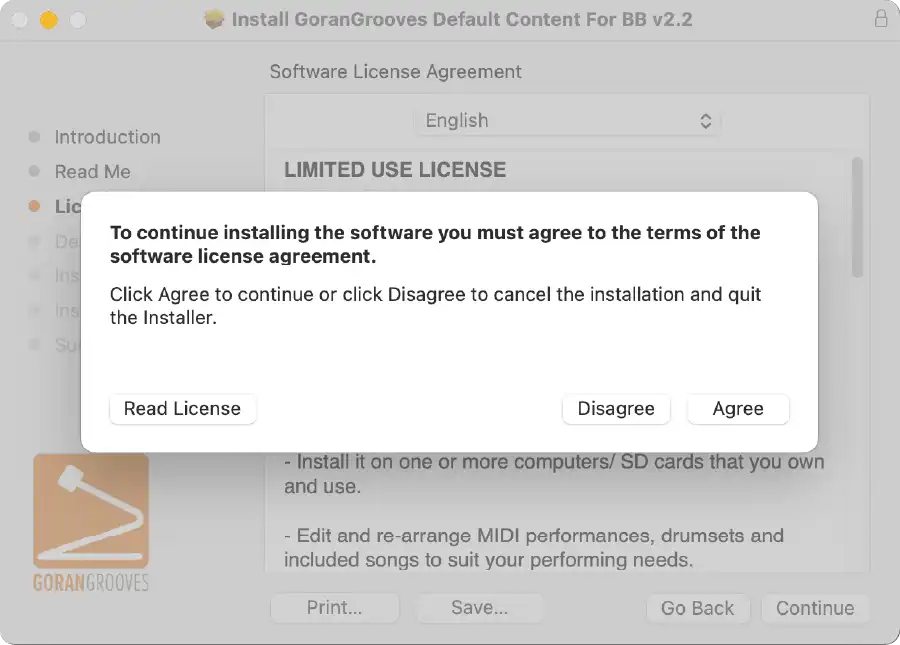
Read the brief legal information and proceed to the next step by clicking on the CONTINUE button.
Agree to the license agreement to continue to the next steps.
Step 4- Select your USB drive with a blank SD card #
When prompted, select the SD card drive and click CONTINUE.
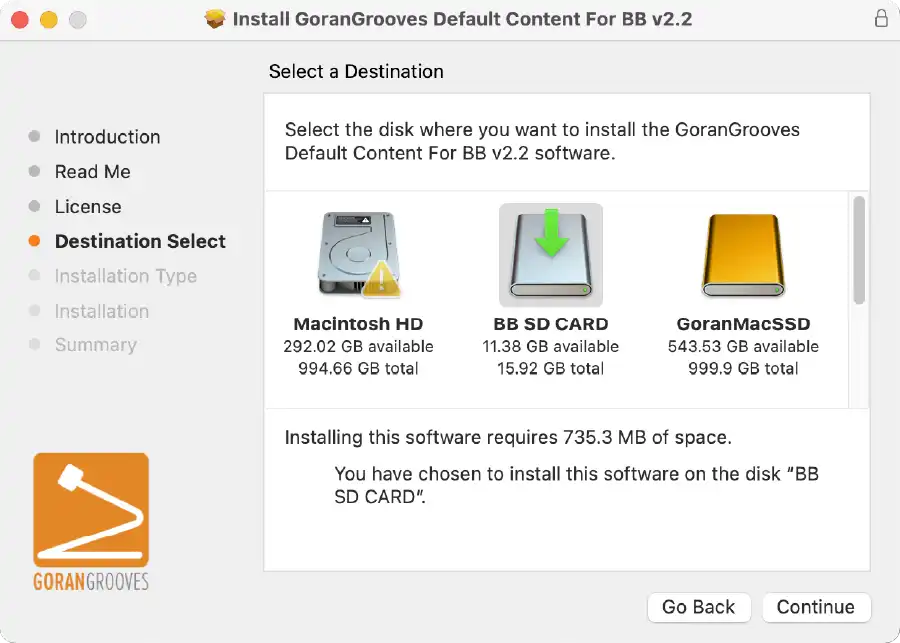
IMPORTANT: The installer will look in the root directory of your selected drive to ensure no BeatBuddy project already exists on it. Only drives with no such project can be used for installation.
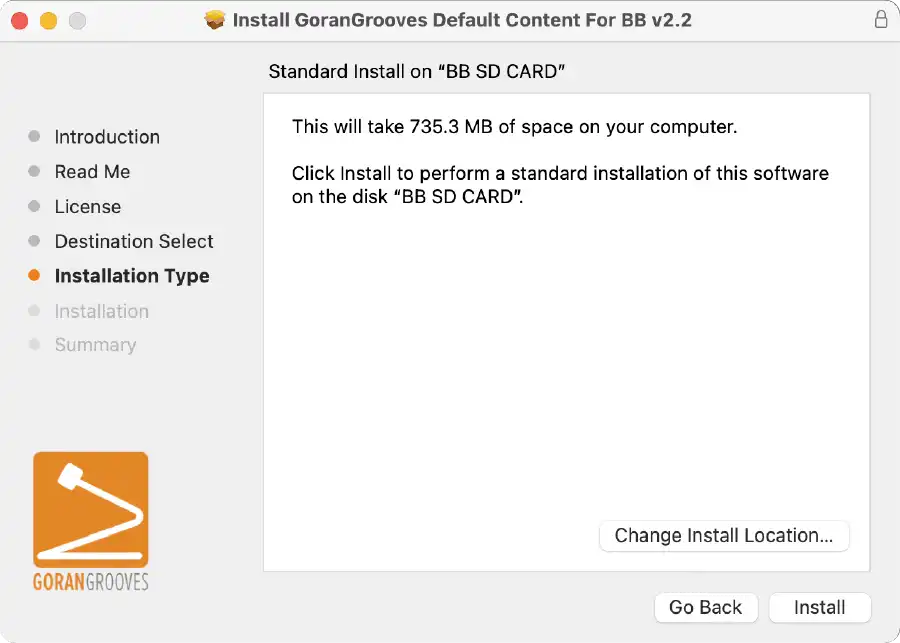
Step 5- Installation Type #
This is a simple overview before the installation begins.
Click “Install” to proceed.
When prompted by your system, enter your admin password so that the installation can begin.
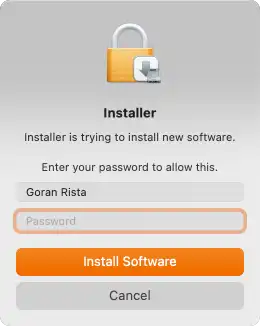
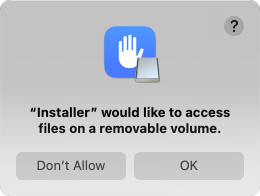
Please give the installer permission to access the removable drive, which is necessary for the installation.
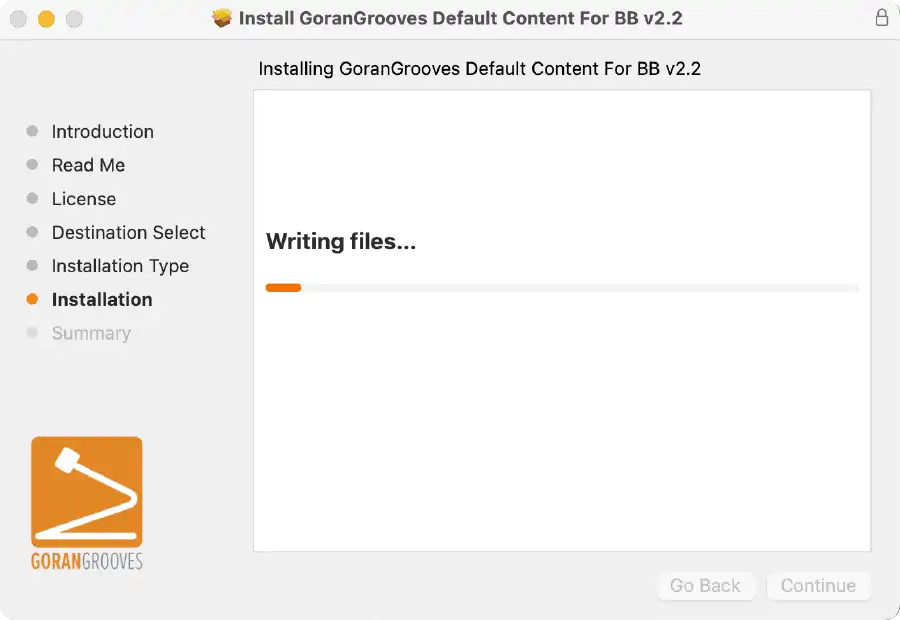
Step 5- Installation #
The progress bar will indicate how much of the installation remains. The extracted content is over 745MB in size and consists of nearly 500 items.
Depending on the speed of your SD card and the card reader, the installation should be completed within a few minutes. Please wait until the process finishes fully.
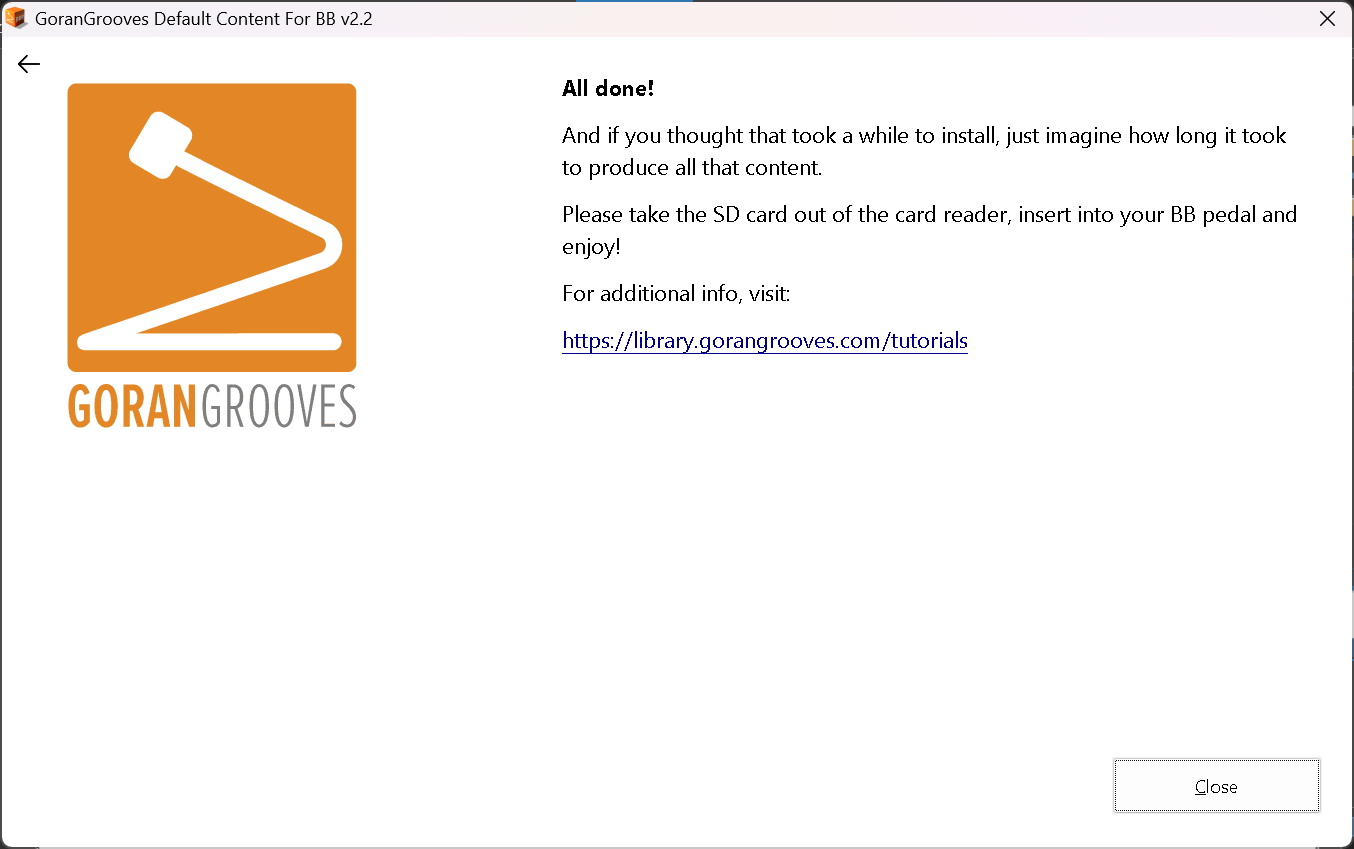
Upon successful installation, you will be presented with the success message.
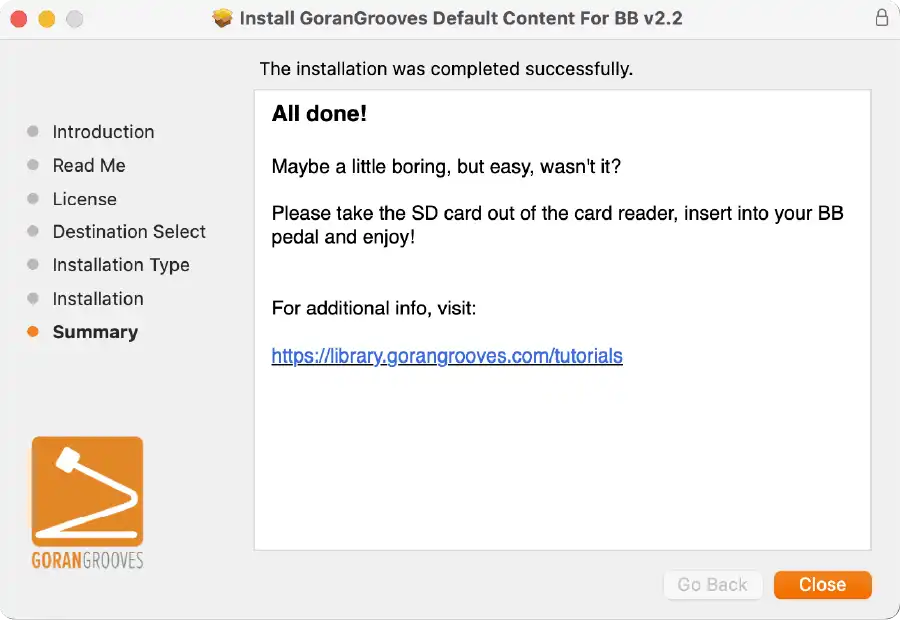
Take the SD card out of your card reader, insert it into your BeatBuddy, and enjoy.
If the SD card doesn’t show when inserted in BeatBuddy, it was probably not properly formatted, or it is too large. For detailed troubleshooting and resolution, see this document.