To get going quickly with Handy Drums plugins, first, make sure that you have installed the plugins you intend to use.
Before using the software, you must authorize it by entering the serial number (license key) you received with your purchase. Here is how to authorize Handy Drums. Alternatively, you can run our plugins in a FREE TRIAL mode.
Handy Drums Plugins: What they are and what they are not #
Handy Drums are virtual drum instruments. They can be used as plugins inside DAWs or as standalone apps. Think of Handy Drums primarily as sound modules that can be played live using a MIDI controller or by routing MIDI loops into them. They are the software equivalent of acoustic drums and percussion instruments and, as such, require a “performer” to play them (either a human being or MIDI loops).
We designed Handy Drums to be straightforward to use and to give you a beautiful, produced, finished drum sound right from the get-go.
They can also be used as standalone apps on Windows and MacOS computers. In that case, you can either play them live using MIDI controllers (eg. electronic drums) or by playing loops directly inside them using the built-in MIDI Loop Browser (Handy Drums v2.0+ only).
Handy Drums are not drum machines.
How To Load Handy Drums Plugins Inside Cubase #
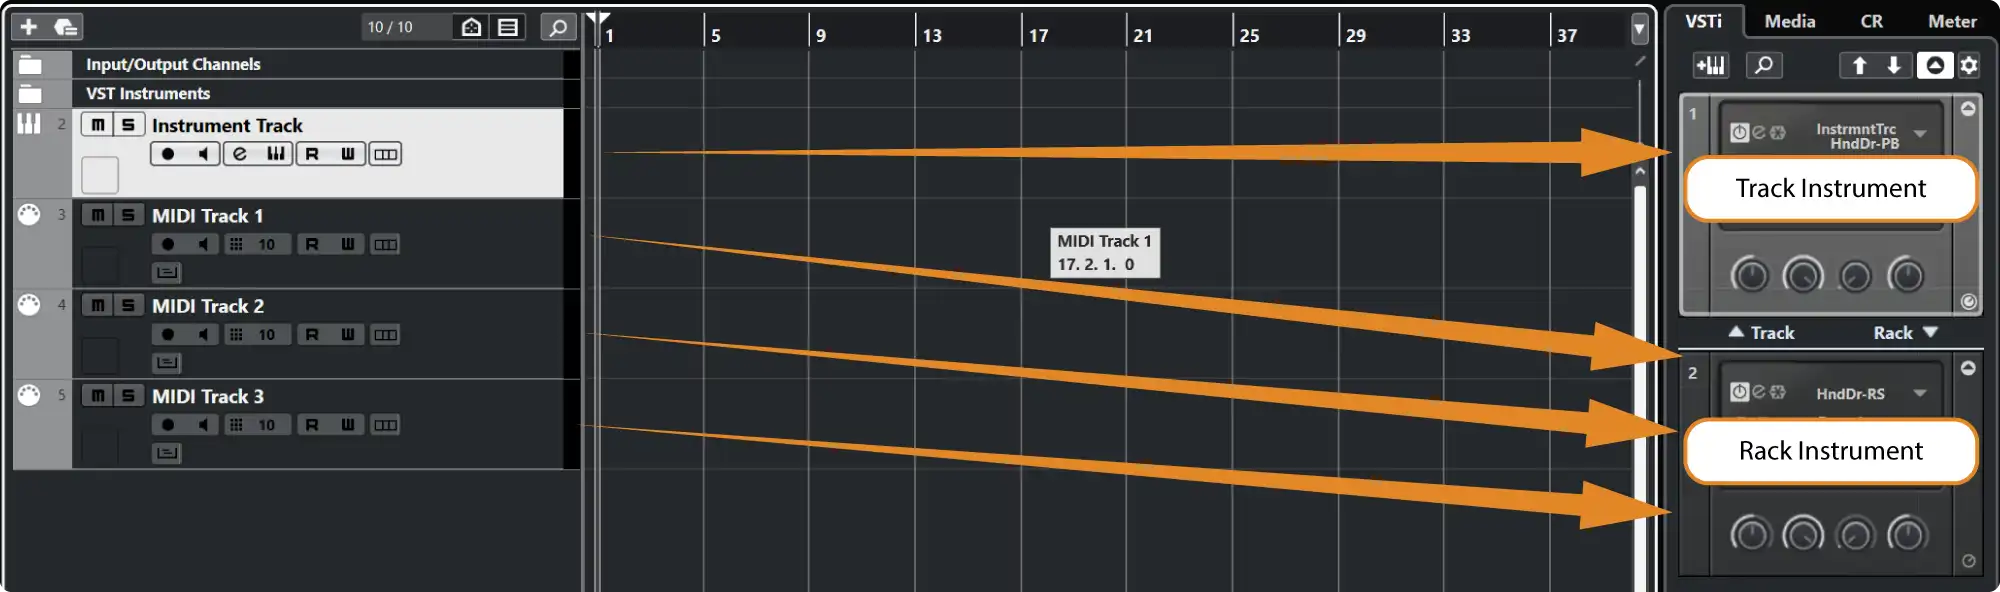
In Cubase/ Nuendo, you can load VSTi3/VSTi2 virtual instruments either as VST Rack Instruments or dedicated VST Track Instruments. A VST Rack Instrument can have several midi tracks triggering it, while a Track Instrument has a single instrument track connected to and triggering it.
The image below demonstrates the concept.
Option 1: Load Handy Drums VI as a Rack Instrument #
To load a Handy Drums plugin within VST Rack, locate the “Rack” button on the top right side of the software in the VSTi window.
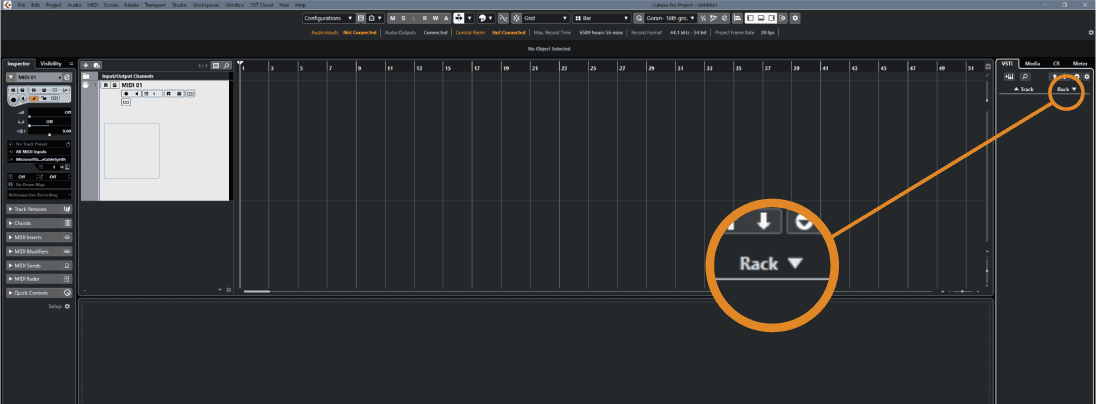
Navigate to the Drum category once a drop-down is presented, and select the Handy Drums plugin of choice.
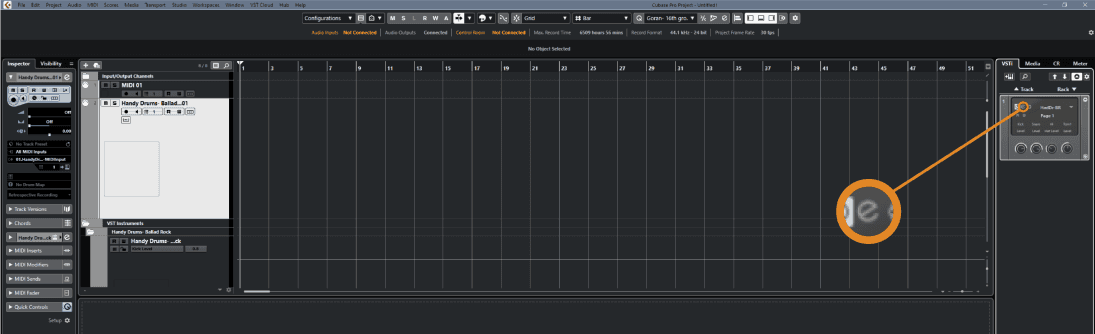
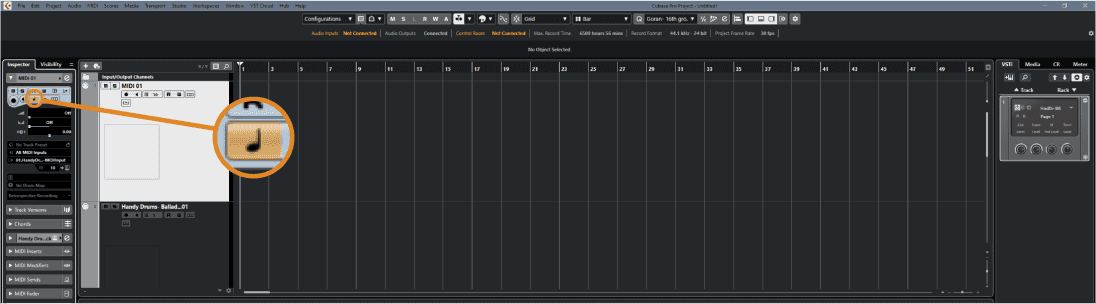
Depending on your Cubase preferences, you will be asked to create a MIDI track that will automatically be connected to this Handy Drums instrument. Click “Create” when prompted, and a few moments later, your MIDI track will be created and automatically connected to the plugins that will show up on the screen, as seen below.
Alternatively, you can right-click in the same window and select “Add rack instrument” to get the popup.
If the GUI does not show up automatically, you may have disabled the automatic GUI display in your software settings. In that case, open the plugin GUI by clicking on the little “e” button on the Rack/Track instrument.
Option 2: Load Handy Drums VI as a Track Instrument #
Similar to loading a Rack instrument, locate the “Track” button on the top right side of the software in the VSTi window.
A popup will allow you to pick a Handy Drums instrument to add to an Instrument track you are about to create. Select a Handy Drums instrument from the Drums category and click on the “Add Track” button, at which point an Instrument track will be created and named as the instrument to which it is automatically connected.
Alternatively, you can right-click in the same window and select “Add Track instrument” to get the popup.
The same can also be achieved from the tracks windows on the left.
Audition Plugin Sounds #
You can audition the sounds contained in the instrument plugin by clicking on the instrument icons above the volume sliders. With each mouse click, the relevant drum samples will be played at random velocities.
How To Play a Drum Loop Through Handy Drums #
To play a drum groove through the Handy Drums plugins, you will need to drop an existing MIDI drum loop onto a MIDI track or create a loop from scratch right on your MIDI track routed to the plugin.
If you created a VST Instrument track, your track will be ready and routed.
If you created a VST Rack instrument and were not prompted to create a new MIDI track, you will need to do this manually.
Create MIDI Track #
Right-click in the tracks area and select the “Add MIDI Track” option. In the following popup, name the track and click Add Track.
Route MIDI track Output #
You must route the new MIDI track to the Handy Drums virtual instrument for it to trigger it.
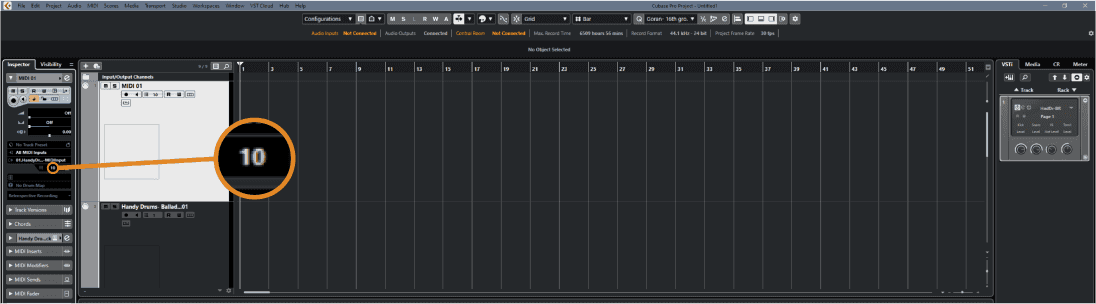
Set The MIDI Track Channel #
Set the track’s MIDI channel to 10.
Set The Track’s Time Base #
Set the time base to Musical if it is not already. It will ensure that your MIDI drum loops on the track follow any tempo changes you make.
Set Drum Map #
Set the drum map to GM Map.
While Handy Drums follow GM drum mapping wherever possible, for the most accurate results, download our Cubase drum maps and load the one relevant to the plugin you are using.
Your track is ready.
Audition MIDI Loops Before Importing Into DAW Project #
Beginning with Handy Drums v2.0, all plugins and standalone apps come with a built-in MIDI Loop Browser. This allows you to browse and audition any drum loops on your system and then import them via simple drag-n-drop.
In addition to previewing and importing MIDI loops, the functionality can also bookmark any folders or loops for quick access. It can also sync tempo and playback controls with your DAW and allows you to play MIDI files inside Handy Drums without the need for a DAW.
The dedicated document covers the MIDI Loop Browser in detail. Make sure to read it to fully take advantage of its capabilities.
Enable Multiple Plugin / Instrument Outputs Inside Cubase #
To output to any of the multiple outputs available in Handy Drums, you must also enable multiple outputs for the plugin inside Cubase.
Right-click on the rack instrument and select:
OUTPUTS > ENABLE ALL OUTPUTS
Then, route any channels inside the Handy Drums plugin to any of the available 16 outputs.
Now that everything is working well, let us dive deeper into Handy Drums’ features and functionalities.