- Introduction
- Updating Default BeatBuddy Drumsets on Windows
- Step 1- Obtain the latest version of the default drumsets
- Step 2- Download the default drumset installer for Windows
- Step 3- Insert an SD Card into the card reader containing a BeatBuddy project
- Step 4- Launch the installer
- Step 5- Select drumsets you wish to update
- Step 6- USB Drive Selection (Win)
- Step 7- Drumset Name Updating and Alphabetical Sorting Options
- Step 8- Installation Progress (Win)
- Updating Default BeatBuddy Drumsets on macOS
- Step 1- Obtain the latest version of the default drumsets
- Step 2- Download the default drumset installer for macOS
- Step 3- Insert an SD Card into the card reader containing a BeatBuddy project
- Step 4- Launch the installer
- Step 5- USB Drive Selection (Mac)
- Step 6- Installation Type
- Step 7- Installation Progress (Mac)
Introduction #
The information presented in this document relates only to GoranGrooves-produced drumsets for BeatBuddy.
It does not relate to BeatBuddy Mini or BeatBuddy drumsets produced by anyone else.
For information related to GoranGrooves Handy Drums, virtual drumsets for DAW, see this document.
Important facts:
- The “Drumsets only” installer is supplied with the GoranGrooves Default Content for BeatBuddy.
- Installers provided for Windows and macOS will install the newest version of the default drumsets, overwriting your existing ones within a BeatBuddy project directly on your SD card.
- The installers will enable you to deselect any drumsets you do not wish to update.
- If drumset names differ from the version you have installed in your BeatBuddy project, the installer will update them and all references to them within your BeatBuddy songs to keep the “default drumset” setting for each song up to date. For example, “Metal” drumset was renamed to “Metal Standard,” and when this installer runs, it will update all songs referencing “Metal” drumset to now reference “Metal Standard” drumset instead.
- Any changes you may have made to the drumsets will be permanently lost after the update.
- If you wish to update the entire Default Content, which includes all default drumsets, see this documentation.
Updating Default BeatBuddy Drumsets on Windows #
Step 1- Obtain the latest version of the default drumsets #
Visit the product page of GoranGrooves Default Content for BeatBuddy to obtain the latest version. It is free.
Step 2- Download the default drumset installer for Windows #
In your GoranGrooves Library account, under the DOWNLOADS tab, click on the large DOWNLOAD button for the GoranGrooves Default Content product.
A pop-up menu will provide several download options and allow you to select the operating system you use to install the product.
Navigate to the “Windows: Install directly on SD card” and click on the package “GoranGrooves Default Drumsets ONLY.” The download will initiate momentarily, and depending on your Internet connection speed, it should complete in a few seconds.

You will find the downloaded file in your default download directory as set by your browser. Ensure the file is fully downloaded before trying to run the installer. When fully downloaded, the installer will have an .exe file extension and display its icon like this:

Step 3- Insert an SD Card into the card reader containing a BeatBuddy project #
Insert the SD Card containing a BeatBuddy project into the card reader connected to your PC.
This can be the SD card that came with your BeatBuddy, or another SD card. For better performance, faster read and write times, we recommend a “Class 10” SD card of at least 4GB in size.
In either case, the SD card must contain a valid BeatBuddy Project.
Step 4- Launch the installer #
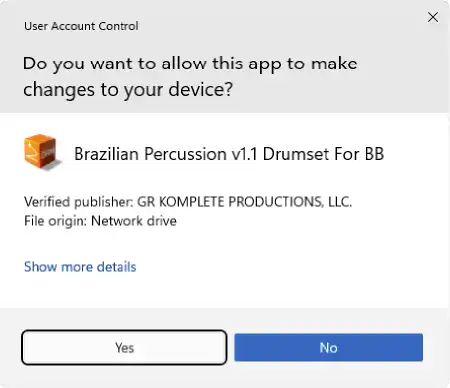
Double-click on the installer you downloaded in step 1, with the .exe extension.
When the Windows security warning pops up asking if you wish to allow the app to make changes to your computer, click YES.
After a few moments, you will be presented with the installation dialog, which will guide you through the step-by-step process.

Read the licensing information and proceed to the next step by clicking on the NEXT button.

Step 5- Select drumsets you wish to update #
All available drumsets will be displayed and selected by default. If you wish to exclude any drumsets from updating, you can deselect them before moving to the next steps.

Step 6- USB Drive Selection (Win) #
When prompted, navigate to your SD card drive.

IMPORTANT: The installer will look for the root of your selected drive, regardless of which directory you navigate to on the drive. For example, if you navigate to “K:\Some folder\Another Folder\My BB Project\”, the installer will look at “K:\” as the installation location.
If no BeatBuddy project is found in the root directory, the installer will prompt you to select the drive again and continue to do so until a valid drive is selected or you quit the installation.
Click “NEXT” to proceed.
Step 7- Drumset Name Updating and Alphabetical Sorting Options #
Generally, each BeatBuddy song has a “default” drumset specified, which is a preferred drumset BeatBuddy will try to load for when the song is recalled. For the correct drumset to be loaded, it must be present in the project, and its name must match the name that a song is referencing. (For example, if a song references the Studio Standard drumset, a drumset with a matching name must be present in your project in order to load.)
GoranGrooves’ Default Content v2.2 has several drumset name changes to match their Handy Drums counterparts. For example, “Brushes” drumset is now “Pop Brushes.” Likewise, GoranGrooves songs for BeatBuddy (both from the Default and Premium library) now reference the new drumset names.
To ensure that all content in your BeatBuddy project references the new drumset names, the installer will run a renaming script to update all drumset references in songs in your project.
For example, if a song previously referenced “Brushes” drumset, after the update, it will reference “Pop Brushes” drumset, which is the new name for the drumset.
You will be presented with the option to sort drumsets alphabetically. Make your choice and click “Next.”

Step 8- Installation Progress (Win) #
Depending on the speed of your SD card and its reader, the installation may take a minute to complete. While the process is running, you will see the progress splash screen.

Upon successful installation, you will be presented with the success message.
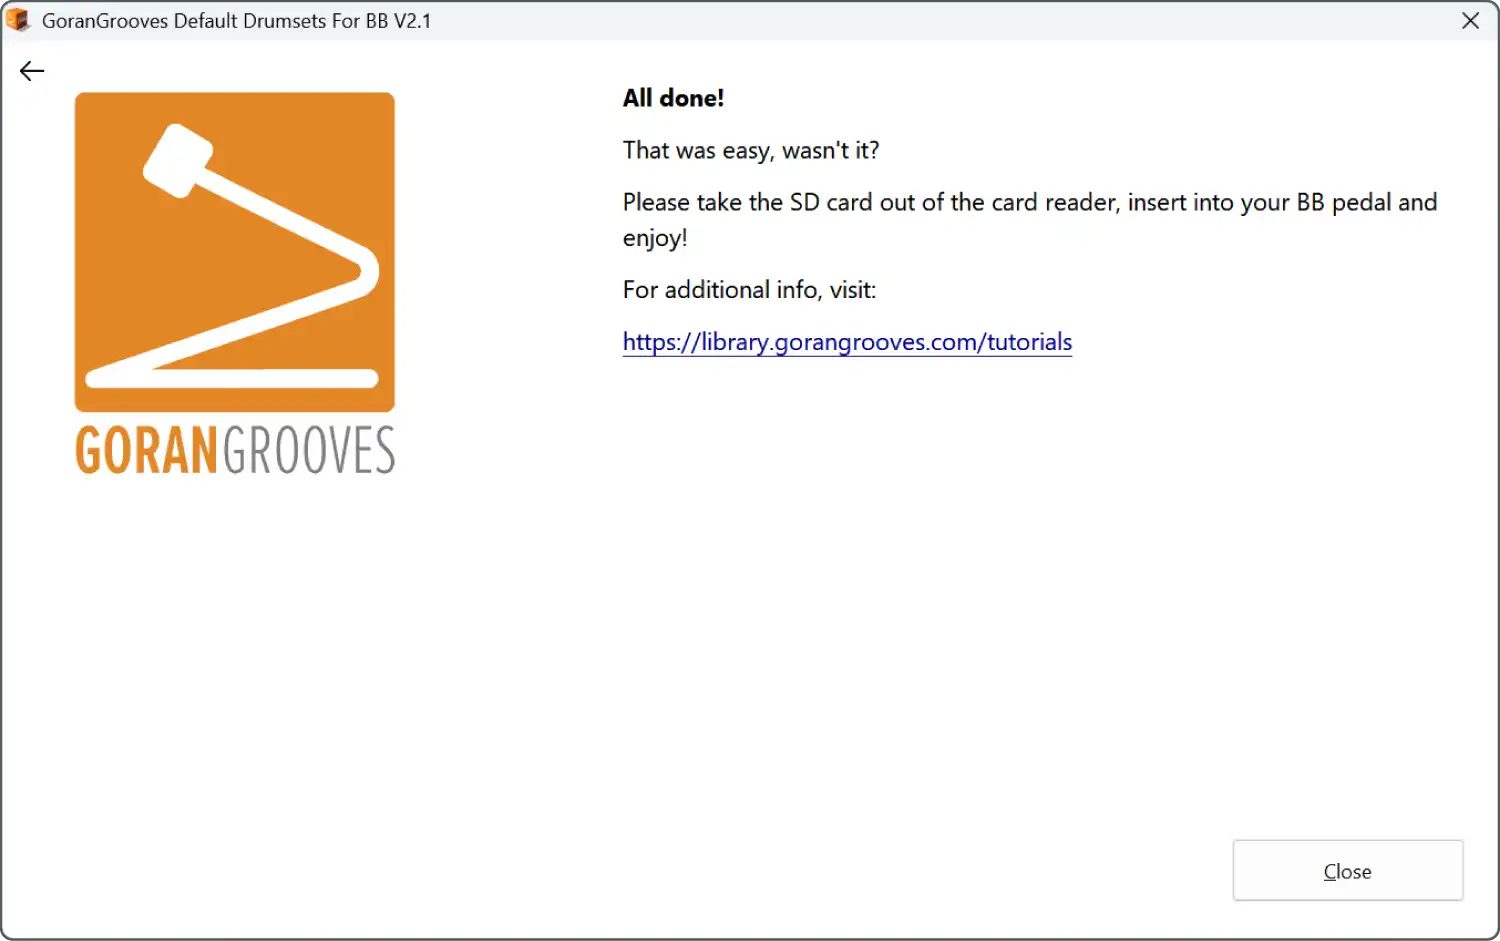
Take the SD card out of your card reader, insert it into your BeatBuddy, and enjoy.
Updating Default BeatBuddy Drumsets on macOS #
Step 1- Obtain the latest version of the default drumsets #
Visit the product page of GoranGrooves Default Content for BeatBuddy to obtain the latest version. It is free.
Step 2- Download the default drumset installer for macOS #
In your GoranGrooves Library account, under the DOWNLOADS tab, click on the large DOWNLOAD button for the GoranGrooves Default Content product.
A pop-up menu will provide several download options and allow you to select the operating system you use to install the product.
Navigate to the “MacOS: Install directly on SD card” and click on the package “GoranGrooves Default Drumsets ONLY.” The download will initiate momentarily, and depending on your Internet connection speed, it should complete in a few seconds.

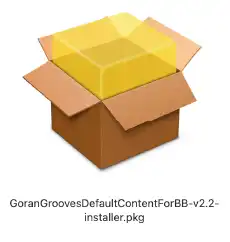
You will find the downloaded file in your default download directory as set by your browser. Ensure the file is fully downloaded before trying to run the installer. When fully downloaded, the installer will have a .pkg file extension and display its icon like this:
Step 3- Insert an SD Card into the card reader containing a BeatBuddy project #
Insert the SD Card containing a BeatBuddy project into the card reader connected to your PC.
This can be the SD card that came with your BeatBuddy, or another SD card. For better performance, faster read and write times, we recommend a “Class 10” SD card of at least 4GB in size.
In either case, the SD card must contain a valid BeatBuddy Project.
Step 4- Launch the installer #
Double-click on the installer you downloaded in step 1, with the .pkg extension.
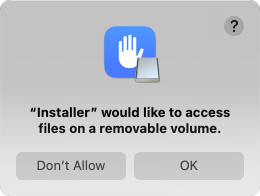
Please grant the installer permission to access the removable drive, which is necessary for the installation. As the installer must verify that a valid BeatBuddy project is present on a removable drive, permission must be granted for that to take place, or drive selection will be rendered impossible. The prompt may appear at a different time during the installation steps.
You will be presented with the installation dialog, which will guide you through the step-by-step process.

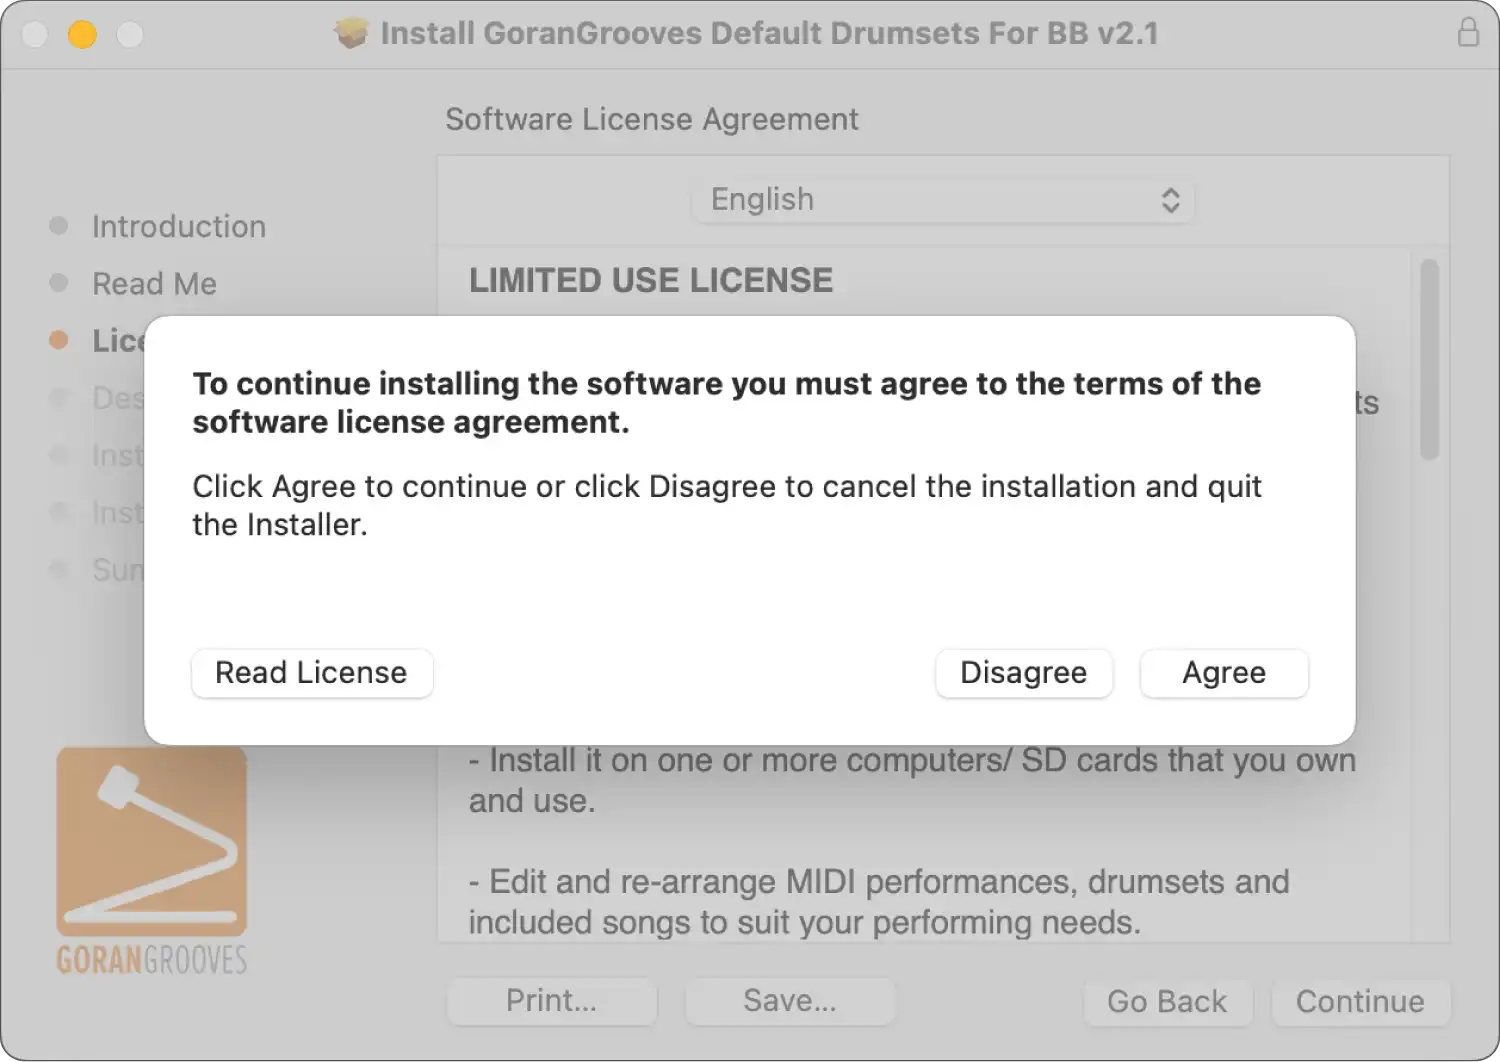
Read the brief legal information in Readme and proceed to the next step by clicking on the CONTINUE button.

Agree to the license agreement to continue to the next steps.

Step 5- USB Drive Selection (Mac) #
When prompted, select the SD card drive and click CONTINUE. The drive must contain a valid BeatBuddy project in its root.

IMPORTANT: The installer will look in the root directory of your selected drive to ensure a valid BeatBuddy project exists. Only drives with such a project can be used for installation. The system drive can not be used for installation.
Step 6- Installation Type #
By default, all drumsets are selected for installation, and you can deselect any that you do not wish to install.

UPDATE DEFAULT DRUMSET NAMES AND REFERENCES TO THEM
Generally, each BeatBuddy song has a “default” drumset specified, which is a preferred drumset BeatBuddy will try to load for when the song is recalled. For the correct drumset to be loaded, it must be present in the project, and its name must match the name that the song references.
GoranGrooves’ Default Content v2.2 has several drumset name changes to match their Handy Drums counterparts. For example, the “Brushes” drumset is now “Pop Brushes.” Likewise, GoranGrooves songs for BeatBuddy (both from the Default and Premium library) now reference the new drumset names.
To ensure that all content in your BeatBuddy project references the new drumset names, the installer will run a renaming script to update your drumset names to their latest version and update all drumset references in songs in your project.
Optional Component: SORT ALL DRUMSETS ALPHABETICALLY
At the bottom of the drumset list, you will notice a script to sort all drumsets in your project alphabetically once the installation is completed. The option is selected by default.
Click on the “Continue” button once you make your selection, and a simple overview will be presented before the installation begins.

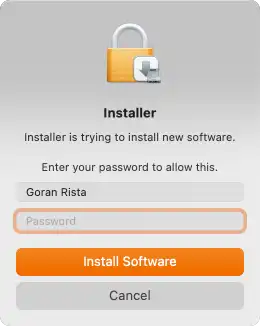
Click “Install” to proceed with the installation.
When prompted by your system, enter your admin password so that the installation can begin.
Step 7- Installation Progress (Mac) #
The progress bar will indicate how much of the installation remains.
Depending on the speed of your SD card and the card reader, the installation should be completed within a couple of minutes. Please wait until the process finishes fully.

Upon successful installation, you will be presented with the success message.

Take the SD card out of your card reader, insert it into your BeatBuddy, and enjoy.